How to fix BMW coolant leaks from expansion tank (B58/N55 engines)
BMW's B58 and N55 engines power some of the most engaging cars in the lineup, delivering smooth power and impressive efficiency. However, one recurring headache for owners is coolant loss traced back to the expansion tank. This seemingly simple plastic component handles extreme pressure cycles, temperature swings, and constant vibration, making it vulnerable over time. When it fails, you face low coolant warnings, sweet smells under the hood, or even puddles beneath the car. Understanding the root causes and following a methodical approach can restore confidence in your cooling system without unnecessary guesswork.
Understanding the Role of the Expansion Tank in B58 and N55 Cooling Systems
The expansion tank—also called the coolant reservoir—serves as the central hub for the high-temperature cooling circuit in these turbocharged inline-six engines. It accommodates coolant expansion during heat-up, maintains system pressure, and allows trapped air to escape through dedicated bleeder lines. Both the N55 (found in many F-series models) and the newer B58 use a similar pressurized design, but material improvements in the B58 don't eliminate plastic fatigue entirely.
Key functions include:
Providing a convenient fill point and level check
Housing the pressure cap that regulates system pressure (typically around 1.4–2.0 bar)
Integrating a level sensor that triggers dashboard warnings
Connecting to multiple hoses for venting and circulation
When cracks form or seals degrade, coolant escapes externally or allows air ingress, leading to inconsistent cooling performance.
Common Symptoms of Expansion Tank Leaks on B58 and N55 Engines
Early detection prevents overheating or warped components. Owners often notice these telltale signs:
Persistent low coolant warning on the iDrive screen, even after topping up
A sweet, syrupy odor in the engine bay or garage after driving
Visible crusty white, pink, or green residue around the tank neck, cap threads, or lower connections
Coolant level dropping steadily in the tank (check when cold for accuracy)
Occasional overflow or burping from the tank when shutting off a hot engine
Small puddles under the front of the vehicle after parking
In many cases, the leak is slow, so the car runs normally for weeks before warnings appear. Ignoring it risks air pockets that reduce heat transfer efficiency.
Typical Causes of Expansion Tank Failure
Plastic degradation stands out as the primary culprit on both engines:
Stress cracks from repeated thermal expansion and contraction
Brittle failure around hose connection points or mounting tabs
Cap seal degradation — the integrated O-ring hardens, loses elasticity, or accumulates debris, allowing pressure to bypass
Bleeder screw issues — rare but documented cases where the small vent screw loosens or separates
Manufacturing variations — some tanks develop micro-fractures near molded seams after years of heat-soak
While other components like hoses, water pumps, or the heat management module connector can mimic expansion tank leaks, visual inspection and pressure testing usually isolate the tank as the source.
Step-by-Step Diagnosis Before Replacement
Proper diagnosis avoids replacing good parts. Follow this sequence:
Park on level ground and let the engine cool completely (at least 4–6 hours).
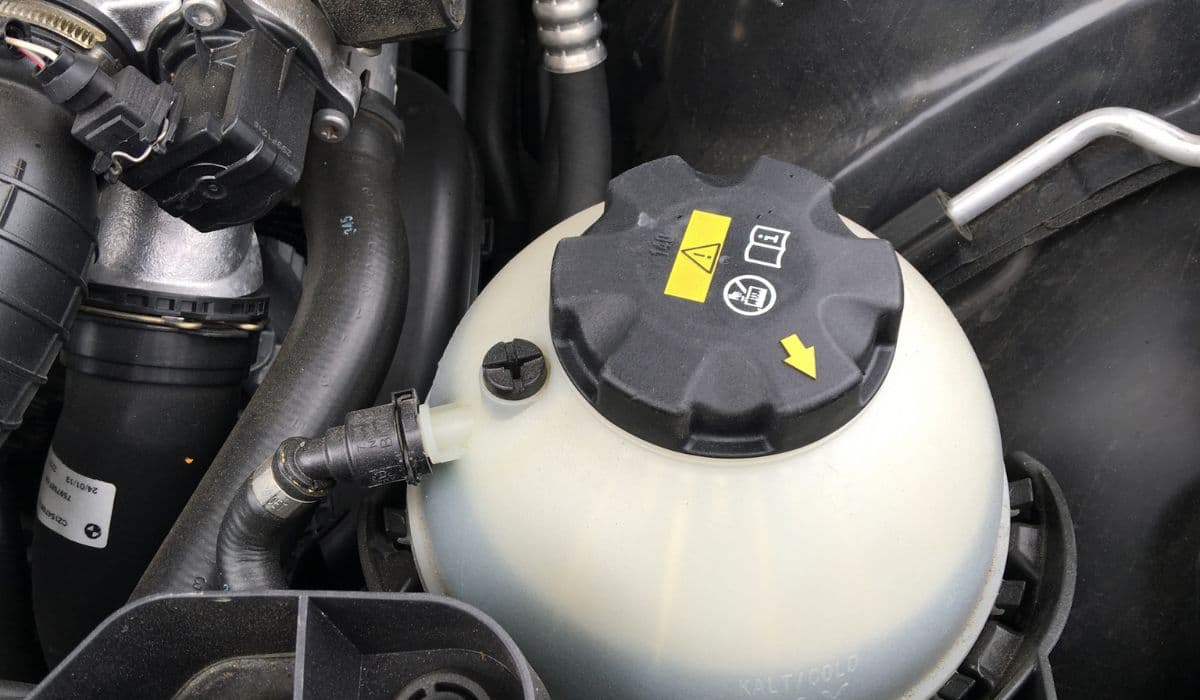
Inspect the tank exterior for cracks, especially near the bottom outlet, side walls, and hose nipples.
Check the pressure cap for worn rubber seals, distorted threads, or white crust inside.
Look for residue buildup on the tank cap O-ring groove and surrounding plastic.
Perform a visual check under bright light or with a mirror for leaks at hose clamps and fittings.
Use a cooling system pressure tester: pump to spec (around 1.5–2.0 bar) and hold for 10–15 minutes. Watch for drops and listen for hisses near the tank.
If pressure holds but coolant still disappears, suspect internal venting issues or a faulty level sensor.
A drop in pressure confined to the tank area strongly points to replacement.
Tools and Preparation for Expansion Tank Replacement
Gather these items for a smooth job:
New expansion tank (OEM recommended for perfect fit)
Fresh BMW-approved coolant (blue antifreeze concentrate mixed 50/50)
Distilled water for mixing
Socket set (10mm, 13mm common)
Flathead screwdriver and pick tool for hose clips
Curved needle-nose pliers for tight hose clamps
Drain pan and siphon pump
Rags, gloves, and eye protection
Work in a well-ventilated area with the engine cold. Siphon or drain as much coolant as possible from the old tank to minimize mess.
Detailed Replacement Procedure
The process is similar for N55 and B58, with minor differences in access due to engine bay layout.
Disconnect the battery negative terminal for safety.
Remove any obstructing covers, air intake ducts, or strut brace bars for better access.
Release the electrical connector to the coolant level sensor.
Loosen and remove the upper vent hose and radiator return hose from the tank (use pliers on spring clips carefully to avoid cracking plastic).
Disconnect the lower outlet hose—often the trickiest; support the tank while squeezing the quick-release fitting.
Unbolt the mounting brackets or tabs (usually 10mm bolts).
Carefully lift the old tank out, draining residual coolant into a pan.
Transfer any reusable sensors or fittings to the new tank if required.
Install the new tank in reverse order, ensuring all hoses seat fully and clamps snap securely.
Reinstall removed components and reconnect the battery.
Double-check every connection before proceeding to refill.
Proper Refill and Bleeding Process
Incomplete bleeding causes recurring low coolant issues. Use this reliable method:
Mix fresh coolant to 50/50 with distilled water.
Fill the new tank slowly to the MAX line.
Start the engine and let it idle to operating temperature (water pump activates automatically).
Monitor the level and top up as air escapes (it may drop noticeably).
Cycle the heater to max heat to open the heater core circuit.
Rev gently to 2,000–2,500 rpm several times to help burp air.
Shut off and let cool, then recheck and top up to the MAX cold line.
Drive normally for a few days, checking level daily when cold.
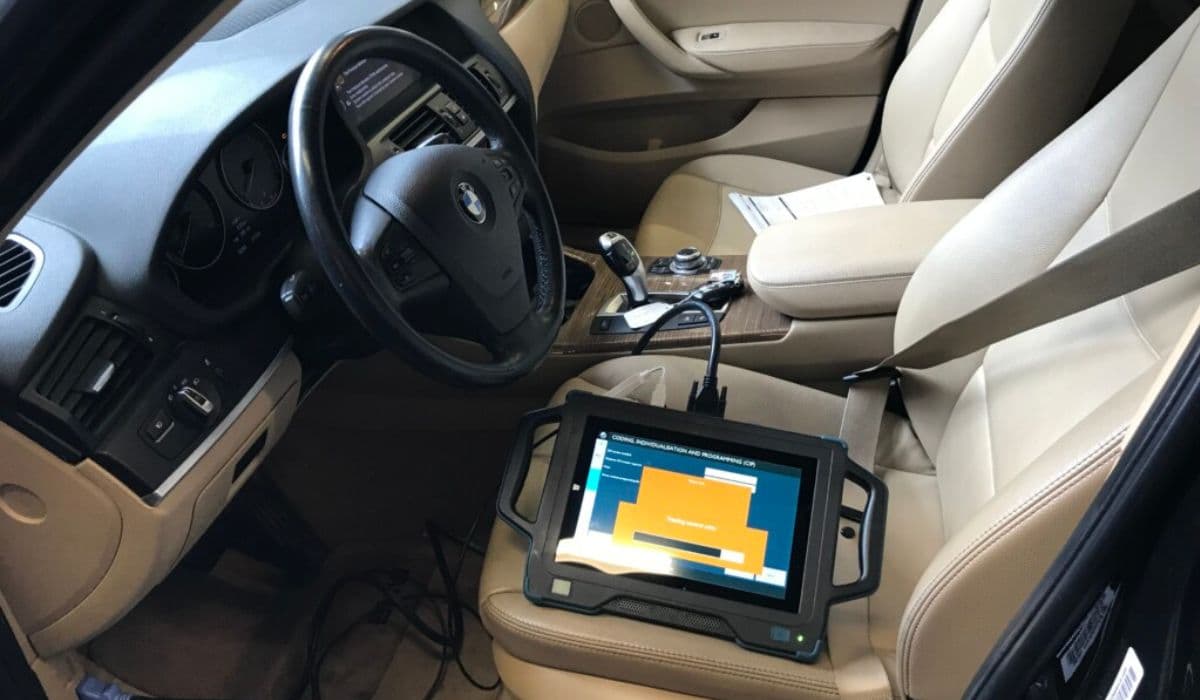
Some models benefit from diagnostic software activation of the electric water pump for enhanced bleeding.
Prevention Tips for Long-Term Reliability
Extend the life of your new expansion tank and cooling system with these habits:
Inspect coolant level every fuel fill-up when cold.
Replace the pressure cap every 4–5 years or during major cooling service.
Use only BMW-approved coolant to prevent seal degradation.
Avoid over-tightening the cap—hand tight plus a click is sufficient.
Address any coolant smell or residue immediately rather than topping off repeatedly.
Consider a full cooling system refresh (hoses, thermostat, pump) around 80,000–100,000 miles.
Proactive maintenance keeps these powerful engines running cool and strong for years.