How to replace cracked Tesla Cybertruck tonneau cover seal
The Tesla Cybertruck stands out with its innovative design and robust features, including the powered tonneau cover that protects the truck bed from the elements. However, over time, the seal around this cover can crack due to exposure to extreme temperatures, UV rays, or mechanical stress from frequent opening and closing. Replacing a cracked tonneau cover seal is essential to maintain water resistance and prevent leaks into the vault area. This guide provides a comprehensive walkthrough based on official procedures and user-reported methods, ensuring you restore functionality without compromising the vehicle's integrity.
Understanding the Role of the Tonneau Cover Seal in Your Tesla Cybertruck
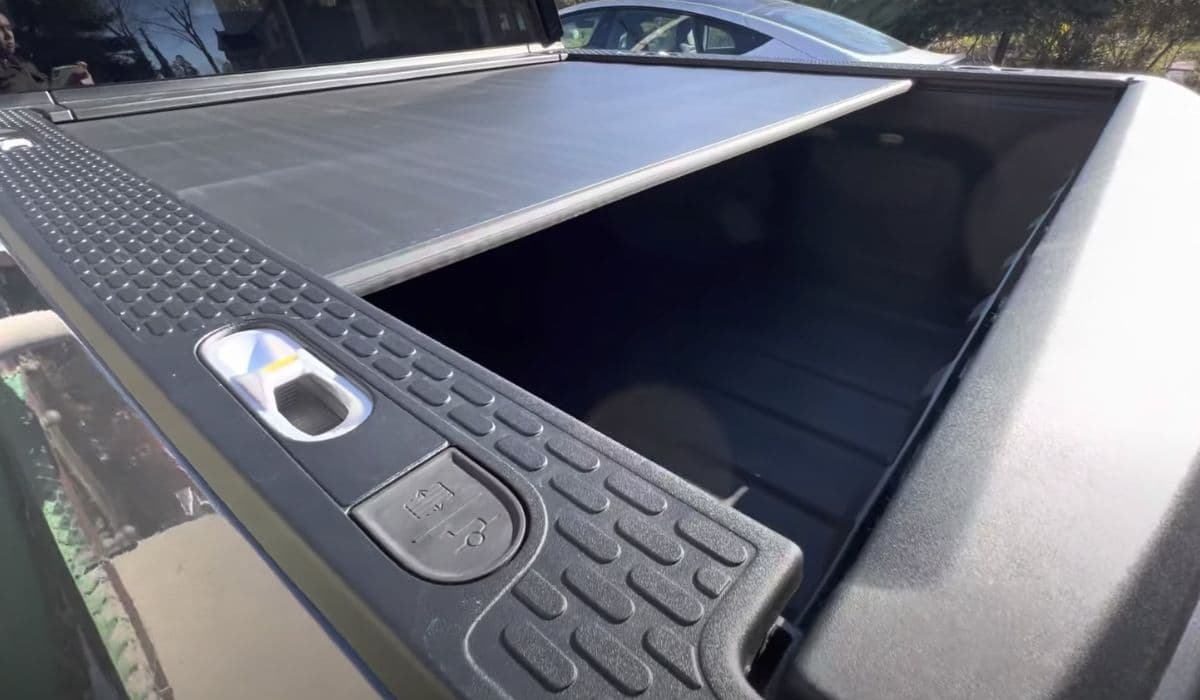
The tonneau cover seal on the Cybertruck serves as a critical barrier against water, dust, and debris entering the bed vault. Made from durable rubber or EPDM material, it runs along the edges of the tonneau rails, aero flaps, and appliques. This seal compresses when the cover closes, creating a tight fit that enhances the truck's aerodynamic profile while safeguarding cargo.
In the Cybertruck, there are multiple seal components, including the water management seals on the left-hand (LH) and right-hand (RH) sides, center seals, and those integrated with the aero flaps. Cracks often develop in high-stress areas like the rail grooves or where the seal meets the roof glass. Factors contributing to damage include thermal expansion in hot climates, freezing in cold weather, or improper alignment during manufacturing or use. Tesla's design aims for water resistance rather than full waterproofing, but a cracked seal can lead to significant moisture intrusion, potentially damaging electronics or stored items.
Owners have reported that early Cybertruck models, particularly those with lower VIN numbers, are more prone to seal issues due to initial production variations. Newer updates from Tesla include enhanced rubber seals on aero flaps to address common leak points. Recognizing the seal's multifaceted role helps in appreciating why timely replacement is crucial for long-term vehicle performance.
Identifying Signs of a Cracked or Damaged Seal
Before diving into replacement, confirm that the seal is indeed the culprit. Visual inspection is key: look for hairline fractures, splits, or gaps along the rubber strips, especially under the aero flaps or along the tonneau rails. These cracks might be subtle but can widen over time.
Water leaks are a primary indicator. After rain or a car wash, check the bed vault for pooling water, particularly near the tailgate or cab end. Users have noted leaks originating from gaps at the seal's end or misalignment with the roof glass. If you notice water trails running toward the front of the bed, it's likely a seal failure.
Other symptoms include unusual noises during tonneau operation, such as squeaking or grinding, which could stem from a stiff, cracked seal interfering with the slats. Reduced closing speed or incomplete sealing might also occur if the seal has lost elasticity. In some cases, owners observe visible holes or missing sections in the seal strip when viewing the top edge with the cover closed. Documenting these issues with photos can be helpful if warranty claims are involved, as Tesla service centers vary in their response to such problems.
Gathering the Necessary Tools and Materials
Proper preparation ensures a smooth replacement process. Start with sourcing the right replacement seal. Tesla part numbers for water management seals include those for LH center (e.g., specific to your VIN), and aero flap upgrades with integrated rubber seals are available through service bulletins. Aftermarket options from suppliers like RealTruck offer EPDM rubber seals compatible with Cybertruck dimensions, but verify compatibility to avoid fit issues.
Essential tools include:
Trim removal tools or plastic pry bars to avoid scratching stainless steel surfaces.
Torque wrench for any bolts, set to specifications like 9 Nm for applique bolts or 36 Nm for side wall assemblies.
Screwdrivers (T30, T40) and sockets (10mm, 13mm, 15mm) for fasteners.
Clean rags, isopropyl alcohol for surface cleaning, and a heat gun for softening old adhesive if needed.
Adhesives like E6000 or silicone caulking for filling gaps in DIY fixes.
Elastic foam strips for padding under aero flaps if addressing leak-prone areas.
Safety gear is non-negotiable: wear gloves to handle sharp edges, and eye protection against debris. If dealing with electrical components near the tonneau motor, disconnect the 48V battery system following Tesla's guidelines to prevent shocks. For comprehensive repairs involving slat systems, assistance from a second person is recommended due to the tonneau's weight and size.
Preparing Your Cybertruck for the Replacement Process
Begin by parking the vehicle on a level surface in a well-lit, dry area. Engage Service Mode via the touchscreen to disable automatic functions and ensure safe access to components. Open the tailgate fully and extend the tonneau cover to its open position.
Inspect surrounding areas: remove any sail appliques if equipped (part numbers like 1741538-XX-X require specific retrofit procedures). Lift bed closeout panels by releasing clips (typically 8x per side) and disconnect connectors carefully. Note the position of tailgate cables and bump stops, as they may need adjustment.
Clean the work area thoroughly. Use isopropyl alcohol to wipe down rail grooves, aero flaps, and appliques, removing dirt, old sealant residue, or debris that could compromise the new seal's adhesion. If the truck has been exposed to water recently, allow it to dry completely to avoid trapping moisture. For vehicles with known leak issues, check for additional problems like missing slats over top-edge holes, which Tesla addresses in reworks by adding protective covers.
Step-by-Step Guide to Removing the Old Seal
Removal demands precision to prevent damage to adjacent parts. Start with the LH water management seal:
With the tailgate and tonneau open, locate the seal along the rail groove.
Release the single clip securing it, then gently pull the seal away from the groove, starting from the rear and working forward. Avoid excessive force; if stuck, use a trim tool to pry evenly.
For aero flap-related seals:
Remove the aero flap by loosening bolts (x2, T30, 9 Nm) and applying upward pressure to disengage front and rear attachment points.
Inspect underneath for gaps in the seal strip. If cracked, peel away damaged sections carefully, noting any adhesive or foam remnants.
If replacing the entire slat system seal, remove bed side wall assemblies (8x clips each), disconnecting electrical connectors and ground straps. Torque specifications include 46 Nm for 15mm bolts and 11 Nm for 10mm bolts.
Repeat for RH side if symmetric damage exists. Dispose of old seals responsibly, as they may contain recyclable rubber. Throughout, monitor for stripped bolts—use low torque initially and replace if damaged.
Installing the New Tonneau Cover Seal
Installation reverses removal but requires attention to alignment for optimal sealing.
Position the new LH water management seal over the rail groove, pushing it firmly into place until the clip engages. Ensure it's seated evenly without twists.
For aero flap upgrades, apply E6000 adhesive or silicone to fill any gaps in the seal strip, then reinstall the flap by aligning mounting points, applying downward pressure, and torquing bolts to 9 Nm.
Reattach bed closeout panels (6x clips per side) and side walls, securing tailgate cables and bump stops. Torque nuts to 7 Nm and bolts as specified.
If adding slats per Tesla's bulletin, insert them over exposed holes at the top edge to enhance water resistance.
Exit Service Mode, close the tonneau cover, and tailgate. Perform a calibration via the touchscreen if the system feels off—select "Tonneau Cover Calibration" and run the process.
Test the seal by gently hosing the area, checking for leaks. Adjustments may be needed if the seal catches outboard of appliques; use a trim tool to reposition.
Testing and Verifying the Replacement
Post-installation verification confirms success. Operate the tonneau multiple times, listening for smooth movement without hitches. Simulate rain by spraying water along the edges, focusing on known weak spots like the roof glass junction.
Inspect the vault interior after testing—any moisture indicates incomplete sealing, possibly requiring realignment or additional foam padding. Measure compression: the seal should depress evenly under pressure. For long-term checks, monitor during actual weather events, noting improvements in water management.
If equipped, review vehicle logs for error codes related to the tonneau system. Owners report 99% leak reduction after proper fixes, but persistent issues might stem from broader assembly problems.
Maintenance Tips to Prevent Future Cracks
Regular upkeep extends seal life. Clean seals monthly with mild soap and water, avoiding harsh chemicals that degrade rubber. Apply UV protectant sprays to shield against sun damage.
Park in shaded areas or use covers in extreme weather. Inspect seals quarterly, especially after off-road use where debris accumulation accelerates wear. Lubricate moving parts sparingly with silicone-based products to reduce friction.
Address minor gaps early with caulking before full replacement is needed. For high-mileage Cybertrucks, consider proactive upgrades like Tesla's new aero flaps with enhanced seals. Monitoring VIN-specific forums can alert you to emerging issues and preventive measures.
When to Seek Professional Assistance
While DIY replacement is feasible for mechanically inclined owners, certain scenarios warrant Tesla service. If your vehicle is under warranty, document leaks and reference service bulletins for free repairs—many centers install upgraded components upon request.
Complex issues, like tonneau motor failures or extensive slat damage, require specialized tools and diagnostics. If removal reveals underlying problems such as misaligned roof glass or electrical faults, professional intervention prevents voiding warranties. Service experiences vary by location; if one center refuses, try another, providing evidence like photos of gaps or water intrusion.
By handling replacements thoughtfully, you ensure your Cybertruck remains reliable and ready for adventures.