How to replace octopus coolant leak (Tesla Model 3 2017–2020)

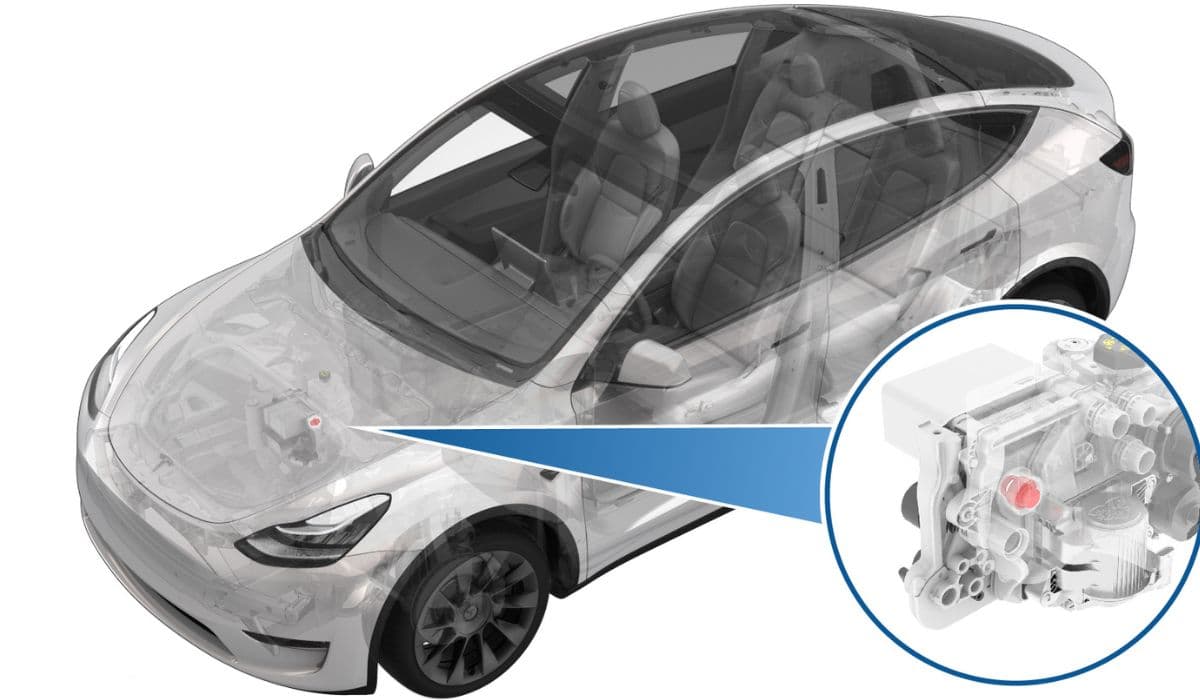
The Tesla Model 3's thermal management system is a marvel of engineering, designed to keep the battery pack, drive units, and cabin comfortable under demanding conditions. Central to this setup in early models is the "octopus" — a multi-port coolant distribution manifold nicknamed for its sprawling hose connections that resemble tentacles. This component routes coolant to critical areas like the battery chiller, power electronics, and heater core. Over time, cracks or failures in the octopus manifold can lead to frustrating coolant leaks, often manifesting as low fluid warnings or visible drips under the vehicle.
Addressing an octopus coolant leak promptly is essential, as it can compromise thermal efficiency and potentially trigger reduced performance modes. While Tesla service centers handle these repairs routinely, experienced owners with the right tools can tackle this as a DIY project, saving time and gaining deeper insight into their vehicle's intricacies.
Understanding the Octopus Manifold and Common Leak Issues
The octopus is a plastic assembly that acts as a hub for multiple coolant lines in the powertrain cooling loop. In early Model 3 vehicles, it integrates several quick-connect fittings and ports, making it vulnerable to material fatigue from thermal cycling, pressure fluctuations, and manufacturing tolerances.
Common causes of leaks include:
Micro-cracks developing at port junctions due to repeated heating and cooling.
O-ring degradation on hose connections, allowing seepage under pressure.
Stress from vibrations or minor impacts weakening the plastic housing.
Improper assembly during production, leading to premature failures in higher-mileage examples.
Symptoms often start subtly: a gradual drop in coolant level visible in the reservoir, accompanied by dashboard alerts like "Coolant level low" or thermal system warnings. You might notice a sweet odor from evaporating glycol or blue-tinted stains under the front of the car. Ignoring these can escalate to overheating risks during fast charging or aggressive driving, where the system works hardest.
Safety Precautions Before Starting the Repair
Working on the coolant system requires caution, as it involves pressurized fluid and proximity to high-voltage components. Always prioritize safety to avoid spills, burns, or electrical hazards.
Key preparations:
Park on a level surface and engage parking mode.
Allow the vehicle to cool completely if recently driven.
Wear protective gloves and eyewear to handle coolant, which is toxic if ingested.
Disconnect the 12V battery to prevent accidental pump activation.
Have absorbent materials ready for any spills, and dispose of old coolant responsibly.
Never open the system while hot, as pressure buildup can cause sudden sprays. If you're unsure about high-voltage isolation, consider professional assistance.
Tools and Materials Needed
A successful replacement relies on having the proper equipment. Tesla's design uses specialized connectors, so generic tools won't suffice.
Essential items:
Tesla-specific coolant hose quick-disconnect tools for safe release.
Torque wrench for precise fastener reinstallation.
Coolant drain pan and vacuum fill tool for efficient refilling.
Genuine replacement octopus manifold assembly (ensure compatibility with early penthouse designs).
Fresh G-48 coolant mixed to specification.
Clips, O-rings, and plugs for temporary sealing during disassembly.
Optional but helpful: jack stands for underbody access and a scan tool to monitor system status post-repair.
Step-by-Step Diagnosis to Confirm the Leak
Before diving into replacement, verify the octopus is the culprit — leaks can mimic from nearby hoses or the reservoir.
Diagnostic steps:
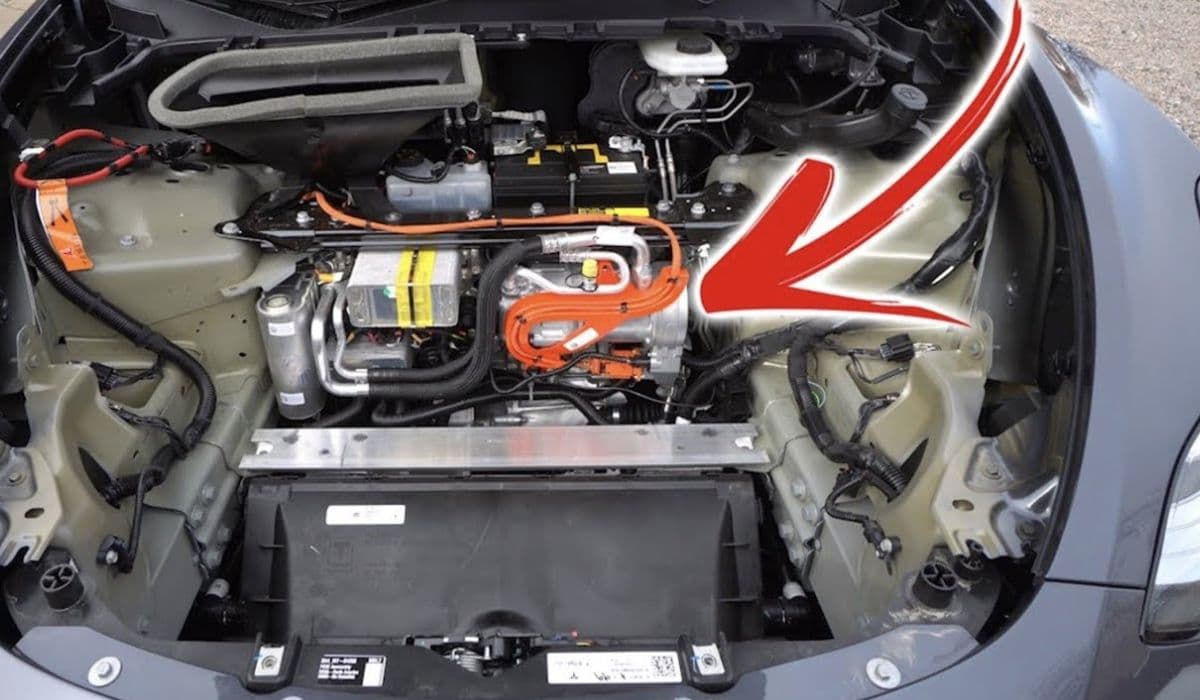
Visually inspect under the frunk area around the penthouse for wet spots or crusty residue.
Enter service mode via the touchscreen to check for thermal alerts or low coolant flags.
Pressure test the loop using adapters to isolate sections.
Run the thermal fill/drain routine to cycle pumps and observe for drips at manifold ports.
Feel connections while the system pressurizes for warm, moist areas indicating active leaks.
If the leak traces directly to the octopus body or its integrated fittings, proceed to replacement.
Removing the Faulty Octopus Manifold
Accessing the octopus involves partial disassembly of the frunk components and penthouse cover.
Removal process:
Depressurize the system by running the coolant drain routine in service mode.
Carefully disconnect hoses using release tools — plug open ends immediately to minimize fluid loss.
Unbolt mounting brackets and electrical connectors attached to the assembly.
Maneuver the manifold out, noting hose routing for reassembly.
Drain residual coolant from ports into your pan.
Take photos at each stage for reference. The plastic can be brittle, so apply gentle, even force to avoid cracking adjacent parts.
Installing the New Octopus Assembly
With the old unit removed, installation reverses the process but demands precision for leak-free seals.
Installation tips:
Transfer any reusable sensors or brackets to the new manifold.
Lubricate O-rings lightly with coolant for smooth connections.
Route hoses exactly as original to prevent kinks or strain.
Secure all quick-connects until they click firmly, then perform push-pull tests.
Torque bolts to specifications to avoid over-stressing the plastic.
Double-check alignments — misrouted lines can cause flow restrictions or future failures.
Refilling and Bleeding the Coolant System
Proper refilling is crucial to eliminate air pockets that could impair cooling performance.
Refill procedure:
Use a vacuum tool to evacuate the system for thorough air removal.
Slowly add premixed coolant through the reservoir while monitoring levels.
Run the vehicle's air purge routine multiple times via service mode.
Top off as bubbles work out, aiming for the max line when cold.
Test drive gently, monitoring temperatures and alerts.
Expect several cycles to fully bleed — patience here prevents hot spots in the battery pack.
Testing and Final Checks After Replacement
Once complete, validate your work to ensure reliability.
Post-repair verification:
Scan for new errors and clear any residual codes.
Pressure test the entire loop for 20-30 minutes.
Monitor coolant level over several drives and charging sessions.
Inspect for drips after parking overnight.
Confirm normal thermal performance during varied driving conditions.
A successful repair restores full efficiency, eliminating warnings and preserving range.
Mastering an octopus manifold replacement deepens your appreciation for the Model 3's sophisticated thermal architecture. With careful execution, you'll resolve the leak effectively, keeping your EV performing at its peak for miles to come.