Brake Fluid Flush Every 3 Years Guide Honda Pilot
Brake fluid is the unsung hero of your Honda Pilot's braking system, transmitting the force from your foot on the pedal to the calipers that squeeze the brake pads against the rotors. This hydraulic fluid operates under extreme conditions, enduring high temperatures and pressures every time you stop or slow down. In a vehicle like the Honda Pilot, which often hauls families, trailers, or gear over varied terrains, maintaining optimal brake fluid quality ensures responsive stopping power and prevents potential failures.
Over time, brake fluid absorbs moisture from the air through microscopic pores in hoses and seals, a process known as hygroscopic absorption. This contamination lowers the fluid's boiling point, leading to vapor lock during intense braking scenarios, such as descending steep hills or emergency stops. For Honda Pilot owners, regular maintenance isn't just about following a schedule—it's about preserving the SUV's reliability for daily commutes or long road trips.
Why Flush Brake Fluid Every 3 Years in a Honda Pilot?
Flushing brake fluid every three years aligns with Honda's recommended maintenance intervals for many Pilot models, but it's more than a manufacturer's suggestion. As the fluid ages, it accumulates contaminants like metal particles from wear on brake components and rubber debris from seals. These impurities can corrode internal parts, leading to spongy pedals or uneven braking.
In the Honda Pilot, equipped with advanced systems like Vehicle Stability Assist (VSA), clean fluid is crucial for electronic modulation during slippery conditions. Neglecting this can compromise the anti-lock braking system (ABS), making it less effective on wet roads or during panic stops. Environmental factors play a role too—humid climates accelerate moisture ingress, while dusty or salty roads introduce more particulates. By adhering to a three-year flush cycle, you extend the lifespan of calipers, master cylinders, and hoses, potentially avoiding costly repairs down the line.
Consider real-world scenarios: Imagine navigating a winding mountain road with a fully loaded Pilot. Fresh brake fluid maintains consistent pressure, giving you confidence in every curve. Skipping flushes might result in faded brakes, where heat buildup causes temporary loss of stopping power—a risk no driver wants.
Signs Your Honda Pilot Needs a Brake Fluid Flush Sooner
While three years is a solid guideline, certain indicators suggest flushing earlier to keep your Pilot performing at its best. Pay attention to these symptoms:
A soft or spongy brake pedal that requires more effort to engage, often due to air bubbles or degraded fluid.
Darkened fluid color visible through the reservoir—fresh DOT 3 or DOT 4 fluid is clear or light amber, turning brown or black as it contaminates.
Unusual noises like grinding or squealing during braking, which could stem from corroded components affected by old fluid.
Dashboard warnings, such as the brake light illuminating intermittently, signaling low fluid levels or system issues.
Reduced braking efficiency in hot weather, where moisture-laden fluid boils easier, causing vapor pockets.
Monitoring these signs during routine checks, like oil changes, helps catch problems early. For Honda Pilot enthusiasts who tow or drive in stop-and-go traffic, these cues might appear before the three-year mark, prompting proactive action.
Step-by-Step Guide to Flushing Brake Fluid in Your Honda Pilot
Performing a brake fluid flush on your Honda Pilot can be a rewarding DIY project if you're mechanically inclined, or a straightforward service at a trusted shop. The process involves bleeding old fluid from the system and replacing it with fresh, compatible fluid—typically DOT 3 for most Pilots, but always check your owner's manual.
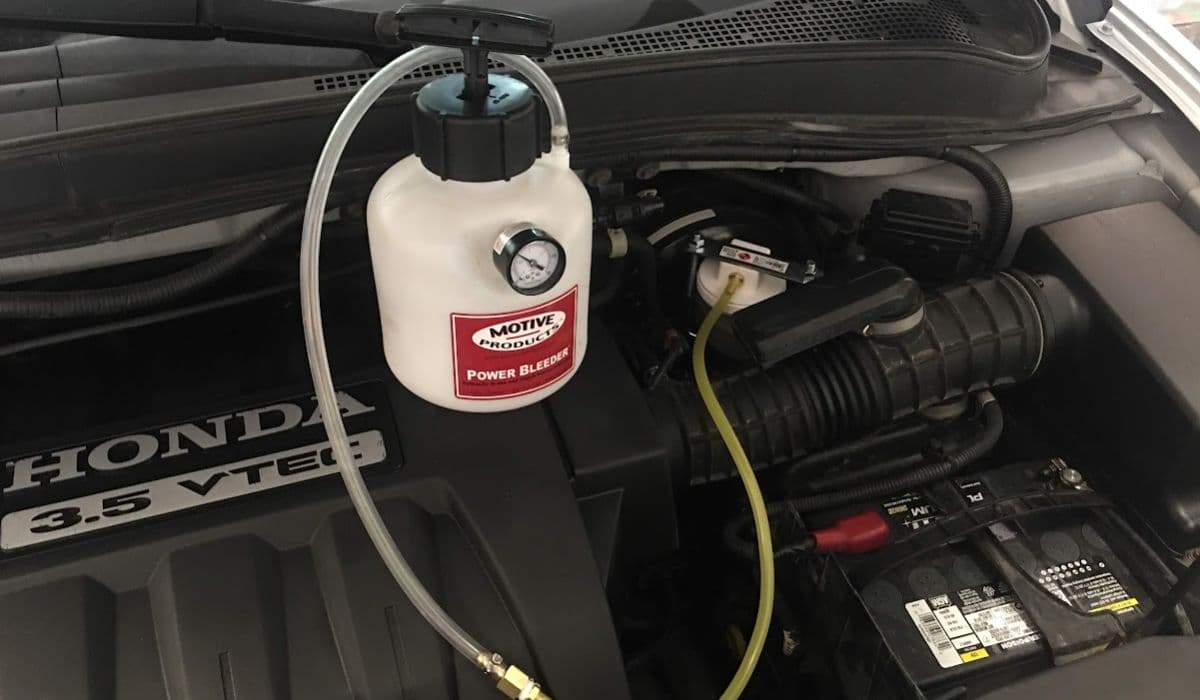
Start by gathering essentials: a brake bleeder kit, fresh fluid, a turkey baster for reservoir extraction, and jack stands for safe elevation. Park on a level surface and engage the parking brake.
Begin at the master cylinder reservoir: Remove the cap and siphon out as much old fluid as possible to minimize contamination.
Jack up the vehicle and remove wheels for access to bleeder valves, starting from the farthest wheel (usually rear passenger side) and working toward the closest (front driver side).
Attach a clear hose to the bleeder valve, submerging the other end in a catch bottle half-filled with fresh fluid to prevent air entry.
Have an assistant pump the brake pedal several times, then hold it down while you open the valve to release old fluid—close it before the pedal reaches the floor.
Repeat until clear fluid flows, topping off the reservoir frequently to avoid introducing air.
Proceed to each wheel in sequence, ensuring the system remains pressurized.
After flushing, test the brakes in a safe area, feeling for firmness. This method not only refreshes the fluid but also expels air, restoring peak performance to your Pilot's braking system.
Benefits of Regular Brake Fluid Maintenance for Honda Pilot Owners
Sticking to a three-year flush routine yields tangible advantages that enhance your driving experience. Improved brake response translates to shorter stopping distances, critical for avoiding collisions in urban settings or on highways. It also preserves the integrity of ABS and VSA modules, which rely on uncontaminated fluid for precise operation.
Long-term, this maintenance reduces wear on expensive components like wheel cylinders and proportioning valves, common in the Pilot's all-wheel-drive variants. Drivers report smoother pedal feel and greater peace of mind, especially during inclement weather. Moreover, it aligns with overall vehicle health—pairing flushes with tire rotations or inspections creates a comprehensive care regimen.
Envision your Honda Pilot tackling off-road adventures or family vacations with unwavering reliability. Fresh brake fluid supports this by mitigating heat-related issues, ensuring consistent performance regardless of load or conditions.
Common Mistakes to Avoid During a Brake Fluid Flush
Even seasoned Honda Pilot owners can slip up during flushes, leading to suboptimal results or safety hazards. One frequent error is using incompatible fluid types—mixing DOT 3 with DOT 4 can cause seal swelling or fluid breakdown. Always verify specifications.
Another pitfall: introducing air into the lines by letting the reservoir run dry, which necessitates additional bleeding and can cause erratic braking. Rushing the process without proper tools, like using pliers on bleeder valves, risks stripping threads and creating leaks.
Overlooking post-flush checks is common too—failing to torque wheels properly or test drive immediately might mask issues like loose fittings. For Pilots with electronic parking brakes, disengaging them incorrectly can complicate access.
By steering clear of these, you ensure a thorough flush that bolsters your vehicle's safety and longevity.
Enhancing Your Honda Pilot's Braking System Beyond Flushes
While flushes are key, complementary practices elevate your Pilot's braking prowess. Regularly inspect pads and rotors for wear, as uneven surfaces can accelerate fluid contamination. Upgrading to high-performance pads suited for the Pilot's weight can reduce heat generation, easing fluid stress.
Driving habits matter—avoid riding the brakes on descents; use engine braking instead to minimize thermal loads. In regions with harsh winters, rinse undercarriage salt to prevent corrosion that indirectly affects fluid pathways.
Integrating these habits with three-year flushes creates a robust maintenance strategy, keeping your Honda Pilot responsive and ready for any journey.
More from Honda

How to Fix 11th Generation Honda Civic Screen Delamination (2022–2024 Models)
08.12.2025 12:32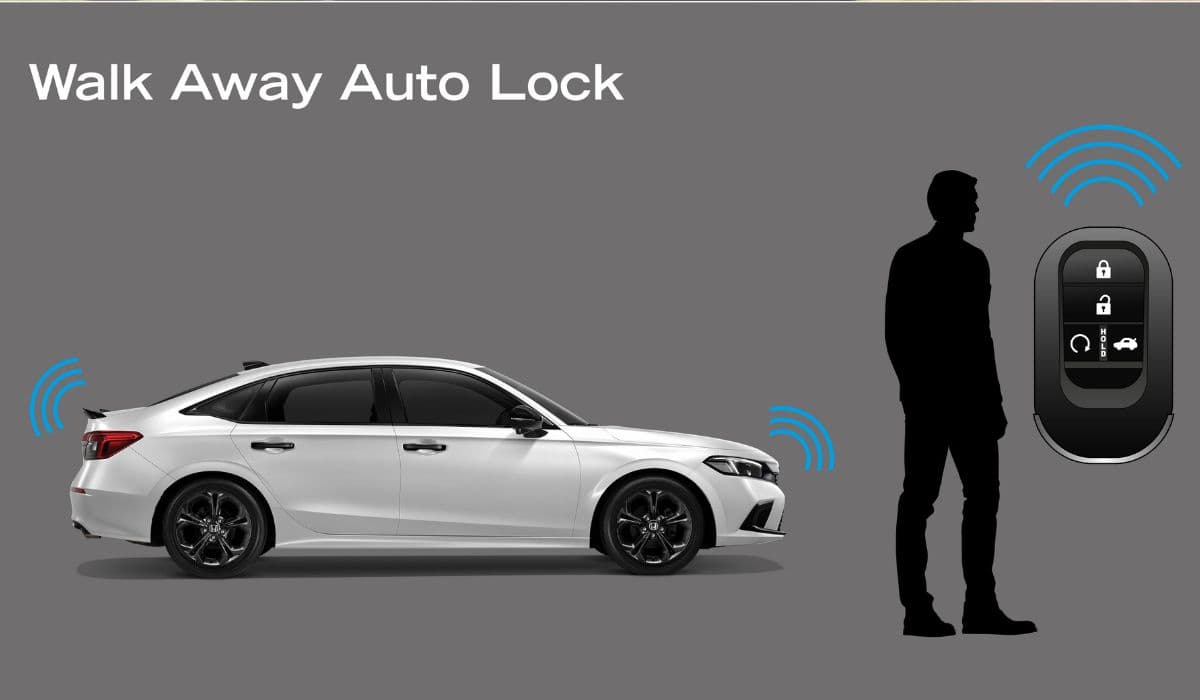
How to Disable Honda Walk Away Auto Lock Forever
08.12.2025 12:44
Honda CR-V: Rear Differential Fluid Change for AWD Models
24.12.2025 06:39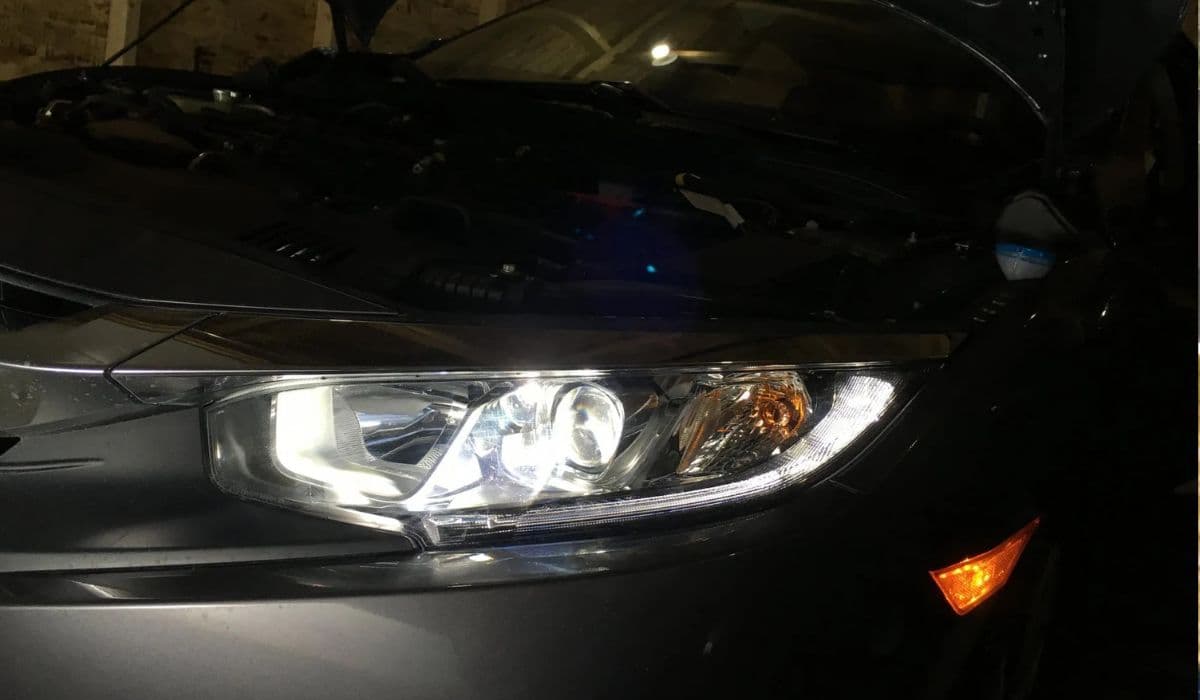
Honda Civic Low Beam Headlight Bulb Replacement Trick That Saves Hours and Broken Clips
08.12.2025 09:38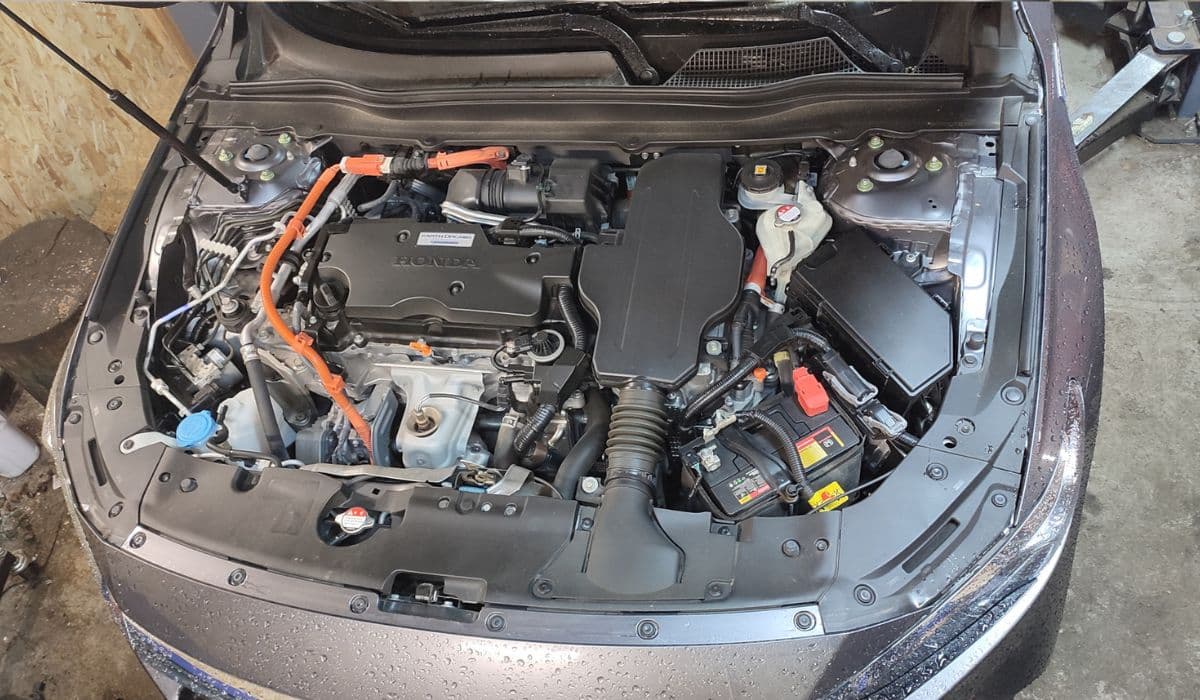
How to Clean the Honda Accord Hybrid Battery Fan Yourself – Full DIY Guide
08.12.2025 08:55