How to fix adaptive headlight malfunction (AHL errors) BMW
BMW's Adaptive Headlight system, often abbreviated as AHL (Adaptive Headlight), represents one of the most sophisticated lighting technologies in modern vehicles. These dynamic xenon or LED headlights automatically adjust their beam pattern based on steering angle, vehicle speed, and body pitch, illuminating curves ahead and preventing glare for oncoming traffic. When the system malfunctions, drivers typically see a dashboard warning like "Adaptive Headlight Malfunction" or CC-ID 295, accompanied by headlights that stay fixed, fail the startup self-test (no up-down or side-to-side movement), or throw persistent errors in diagnostic scans.
Understanding and resolving AHL errors can restore safer nighttime driving without unnecessary expense. This guide explores the most common causes and provides detailed, step-by-step troubleshooting and repair approaches.
Understanding How the BMW Adaptive Headlight System Works
The AHL system relies on several integrated components working in harmony:
Adaptive control modules (one per headlight, often called SMC or TMS modules) process signals and command movements.
Stepper motors inside each headlight adjust vertical leveling and horizontal swiveling.
Sensors including steering angle sensor, yaw rate sensor, acceleration sensors, and ride height sensors feed real-time data.
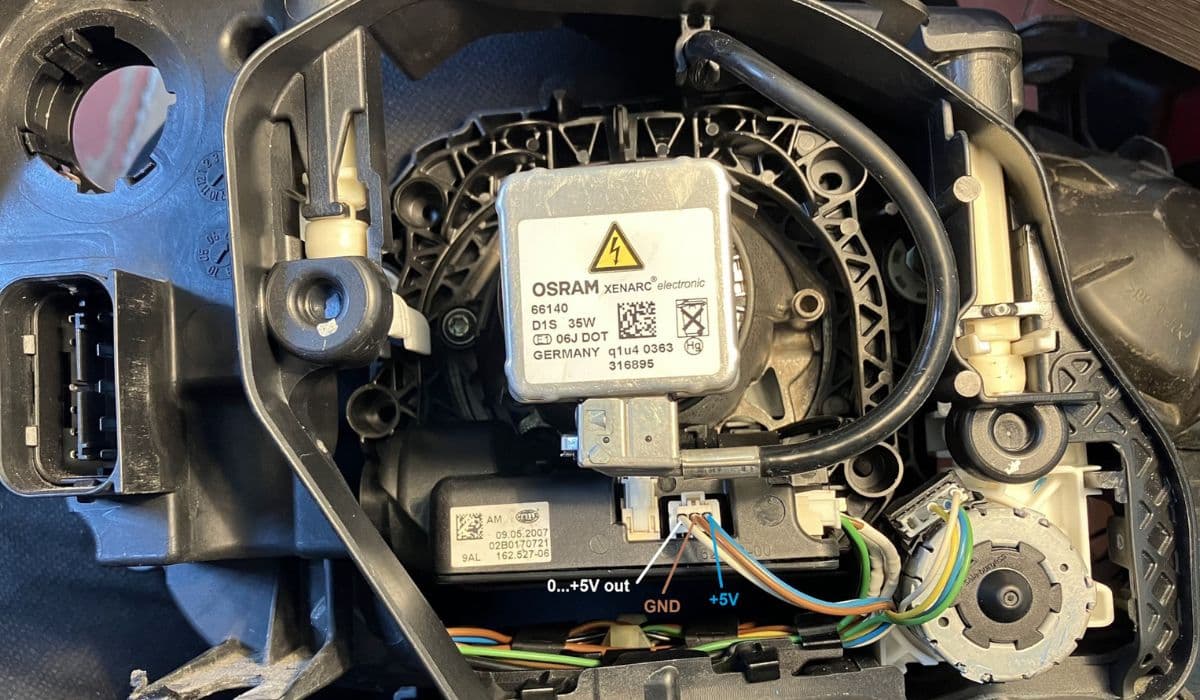
Ballasts and igniters power the xenon bulbs (in older xenon setups).
FRM (Footwell Module) or light module oversees overall communication via LIN or CAN bus.
During startup, headlights perform a characteristic "dance"—moving up/down and left/right—to confirm functionality. If any part fails this test, the system disables adaptation and triggers the warning.
Common Causes of AHL Malfunctions in BMW Vehicles
AHL issues rarely stem from a single dramatic failure. Instead, they develop gradually from environmental exposure or wear.
Moisture ingress and condensation — The leading culprit. Water seeps past aging seals, corroding connectors, PCBs in control modules, or shorting LIN bus lines.
Faulty adaptive headlight control modules — Corrosion damages the electronics, leading to no communication or stuck positions.
Wiring and connector problems — Corroded pins, broken wires (especially green harness wires to motors), or loose plugs interrupt signals.
Defective stepper motors or mechanisms — Motors seize from lack of lubrication or internal binding after moisture exposure.
Sensor-related faults — Dirty or failed steering angle sensor, ride height sensors, or yaw sensors send incorrect data.
Electrical issues — Blown fuses, failing ballasts, or poor grounds affect power delivery.
Software glitches or coding mismatches — After bulb/module changes or battery disconnects, the system may need reinitialization.
Identifying the root cause early prevents cascading failures, such as damaged ballasts from water exposure.
Step-by-Step Troubleshooting Process
Start with simple, no-cost checks before moving to invasive repairs.
Observe symptoms carefully — Note if both headlights or one side fails the startup sequence, if curve lighting works at speed, or if errors clear temporarily after restart.
Scan for fault codes — Use a diagnostic tool to read codes from the FRM/light module. Common ones include A8B0/A8B1 (timeout/no communication) or module-specific faults.
Perform a visual inspection — Look inside headlight housings for condensation, water pools, or corrosion on rear connectors.
Check basic electrics — Verify fuses related to headlights and lighting control; test battery voltage and grounds.
Test movement manually — With the engine running, turn the steering wheel lock-to-lock in a safe area (against a wall at night) to see if beams swivel. Toggle between auto and manual headlight modes to observe recentering.
Clean and reseat connectors — Disconnect the multi-pin plugs at the back of each headlight, spray electrical contact cleaner, and reconnect firmly. This resolves many intermittent issues from oxidation.
If errors persist after these steps, focus on the most frequent failure point: moisture-damaged components.
Diagnosing and Fixing Moisture-Related Failures
Water damage often affects the adaptive module first, as it sits low in the housing.
Inspect for water signs — Remove the headlight access cover or wheel arch liner to view internals. Look for white corrosion, green residue, or droplets.
Dry out the assembly — If minor condensation exists, park in a warm, dry place with headlights on (to generate heat) for several hours. Use silica gel packs inside temporarily.
Replace the adaptive control module — In most cases, this fixes the issue. Modules are accessible after removing the headlight or through the rear. Swap with a known-good unit (coding may be required afterward for full adaptation).
Repair wiring issues — Trace broken wires (often thin green ones to the motor) and solder/repair them. Clean corroded pins with a fiberglass pen or isopropyl alcohol.
Address ballast and bulb problems — If xenon lights flicker or one side is dim, test/replace ballasts, as water frequently damages them alongside the AHL module.
After any replacement, perform a system reset by disconnecting the battery for 15-20 minutes or using diagnostic software to clear adaptations.
Resetting and Coding the Adaptive Headlight System
Many AHL errors linger due to unadapted components.
Basic reset methods — Cycle the ignition multiple times, drive at varying speeds, or use a scan tool to clear codes and perform actuator tests.
Advanced coding — Tools like BimmerCode (with compatible OBD adapter) allow enabling/disabling features or clearing persistent errors. For full reinitialization, professional software may recalibrate steering angle or ride height sensors.
Sensor recalibration — If steering angle sensor faults appear, perform a zero-point calibration (often requiring a scan tool and straight-line driving).
Test thoroughly after resets: startup sequence should complete smoothly, and curve illumination should engage during turns.
Preventive Maintenance for Long-Term Reliability
Protect your AHL system proactively.
Seal headlight housings — Apply silicone sealant around access covers and lenses during any service.
Regular cleaning — Keep sensors (especially under the car) free of dirt and road salt.
Check during routine service — Inspect headlights for fogging or moisture whenever changing bulbs or performing alignments.
Avoid pressure washing near headlights — High-pressure water can force moisture past seals.
By addressing AHL malfunctions methodically—from diagnosis through targeted repairs—you can restore this premium feature's full capability, ensuring safer and more confident night driving.
More from BMW
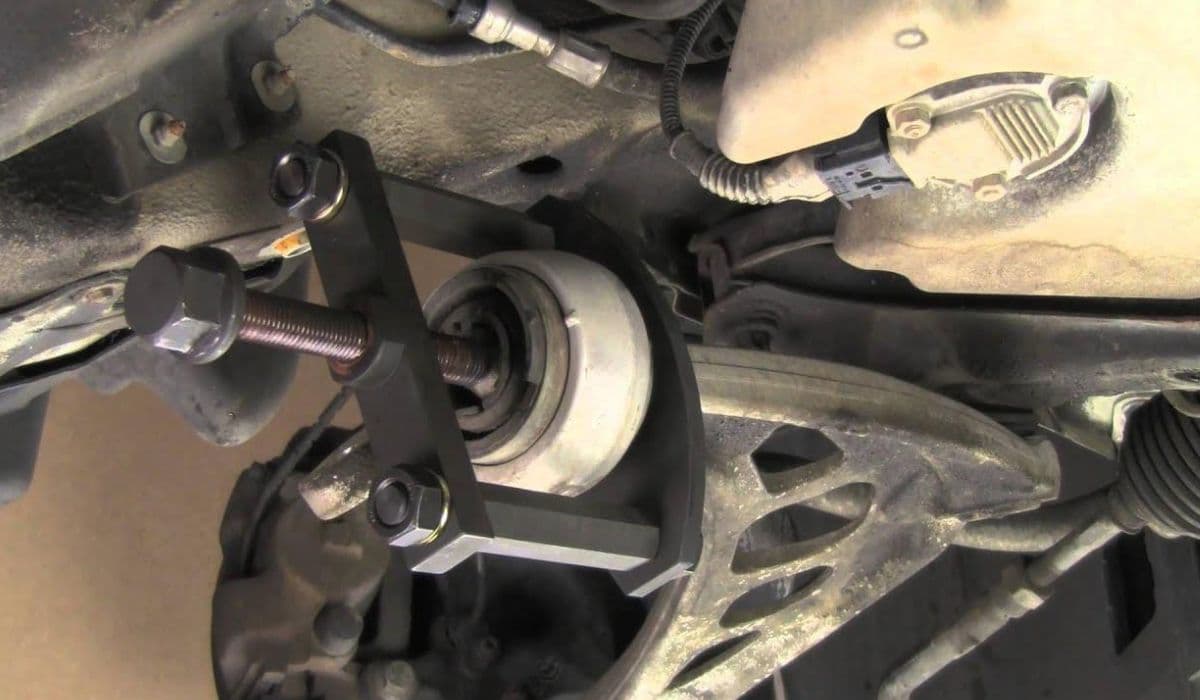
How to replace control arm bushings (front thrust arms) BMW
13.12.2025 12:55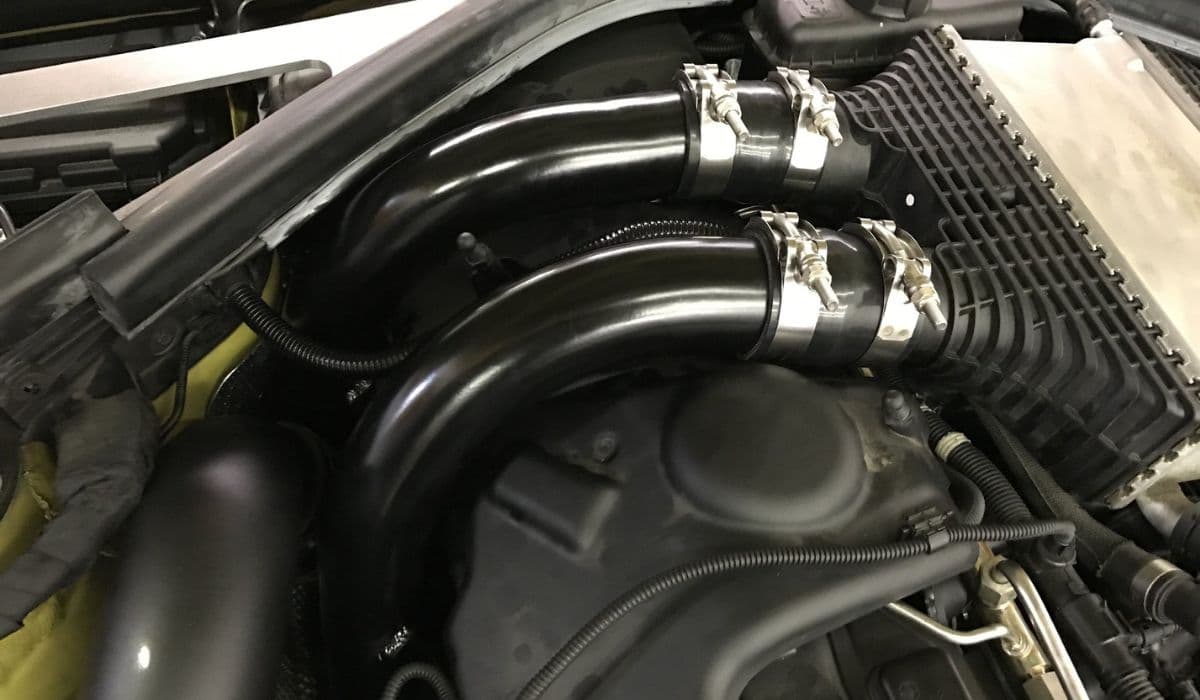
How to fix charge pipe failure on tuned BMW M3/M4
13.12.2025 12:49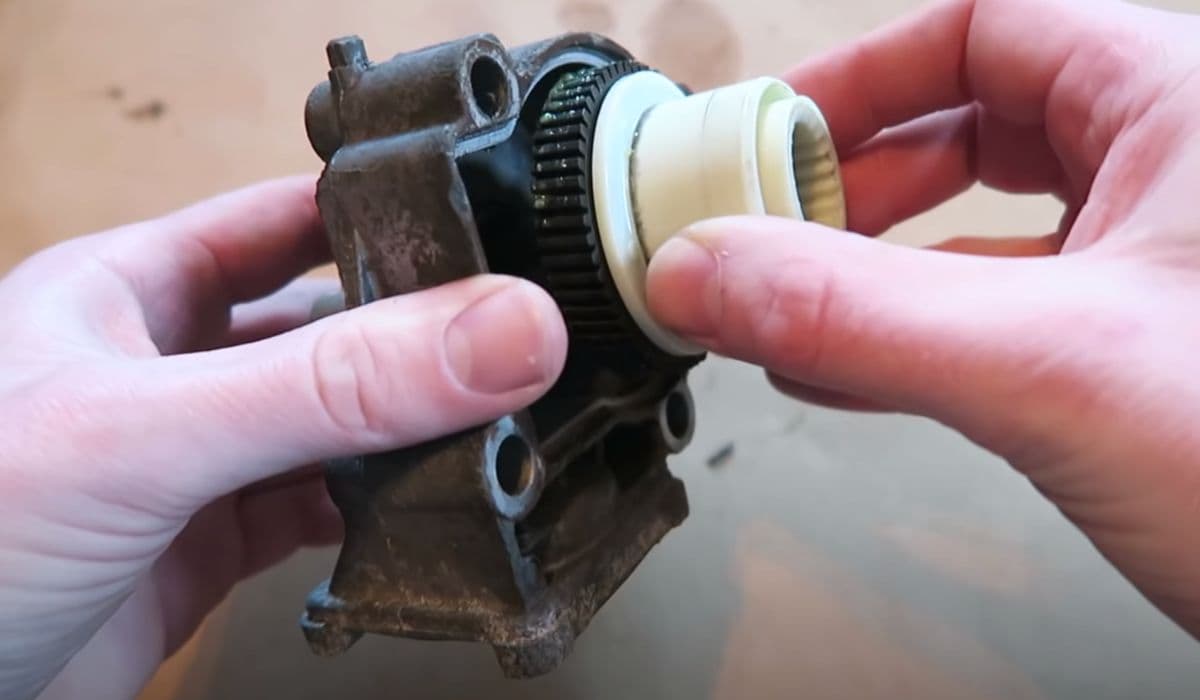
How to replace transfer case actuator BMW (xDrive grinding noise)
13.12.2025 08:45
How to fix FRM footwell module lighting issues BMW
13.12.2025 08:40
How to fix drivetrain malfunction error BMW (2025 models)
13.12.2025 06:24