How to fix dash delamination from weak glue BMW
Dashboard delamination is a frustrating issue that plagues many BMW owners, particularly in models with leather-wrapped or synthetic-covered dashes. The problem stems from the factory adhesive losing its grip over time, often accelerated by heat buildup inside the cabin. As the glue weakens, the top layer separates from the underlying foam or substrate, creating unsightly bubbles, wrinkles, or lifting edges near the windshield and vents. This not only detracts from the premium interior feel but can worsen if ignored, leading to further peeling or even safety concerns like obstructed visibility.
Understanding the root cause helps in choosing the right fix. The original glue wasn't designed to withstand prolonged extreme temperatures, causing it to break down and fail. Fortunately, modern adhesives are far more resilient, offering DIY solutions that can restore your dash without a full replacement.
Why Delamination Happens in BMW Dashes
Heat is the primary culprit. When parked in direct sunlight, the greenhouse effect turns the interior into an oven, softening the adhesive and allowing the covering material to shrink or separate. Other factors include:
Humidity fluctuations that degrade glue bonds
Age-related material fatigue in the foam padding
Poor initial glue application at the factory, often in spots rather than evenly
Models with extended leather options are especially prone, as leather can contract differently from the base material. Early signs include small bubbles around defroster vents or along the base of the windshield.
Tools and Materials You'll Need
A successful repair relies on quality supplies suited for automotive interiors. Gather these essentials:
Fine-gauge syringes (27-gauge recommended) with needles for precise application
Flexible, heat-resistant adhesive designed for fabric or leather bonding
Clean microfiber cloths and isopropyl alcohol for surface prep
Plastic pry tools or thin spatulas to lift material gently
Heat gun or hair dryer for controlled warming
Clamps, heavy books, or weights for pressing during curing
Leather conditioner (if working with genuine leather)
Choose an adhesive that remains elastic after drying to handle temperature swings without cracking.
Preparing the Dashboard for Repair
Proper prep is crucial for a lasting bond. Start by cleaning the area thoroughly.
Park the car in a shaded, well-ventilated space
Vacuum loose debris from vents and crevices
Wipe affected areas with isopropyl alcohol to remove oils and old glue residue
If bubbles are present, gently lift the separated material to access underneath without tearing
For stubborn old glue, light sanding with fine-grit paper can help, but avoid damaging the foam. If the material has shrunk significantly, soften it first with a leather rejuvenator or mild heat to make it more pliable.
The Needle Injection Method for Minor Delamination
This minimally invasive technique works wonders for small to medium bubbles without removing the dash.
Fill a syringe with adhesive, removing air bubbles
Poke the needle into the bubble at an angle, avoiding deep penetration into the foam
Inject small amounts slowly, watching the glue spread under the surface
Massage the area gently with a cloth to distribute evenly
Press down firmly and wipe away any excess immediately
Repeat injections as needed, spacing holes to cover the delaminated zone. The needle marks typically heal invisibly on leather or vinyl.
Benefits of this approach include:
No major disassembly required
Quick execution in an afternoon
Preserves original materials
Allow full curing time as per the adhesive instructions, often 24 hours.
Advanced Repair: Lifting and Re-Gluing Larger Sections
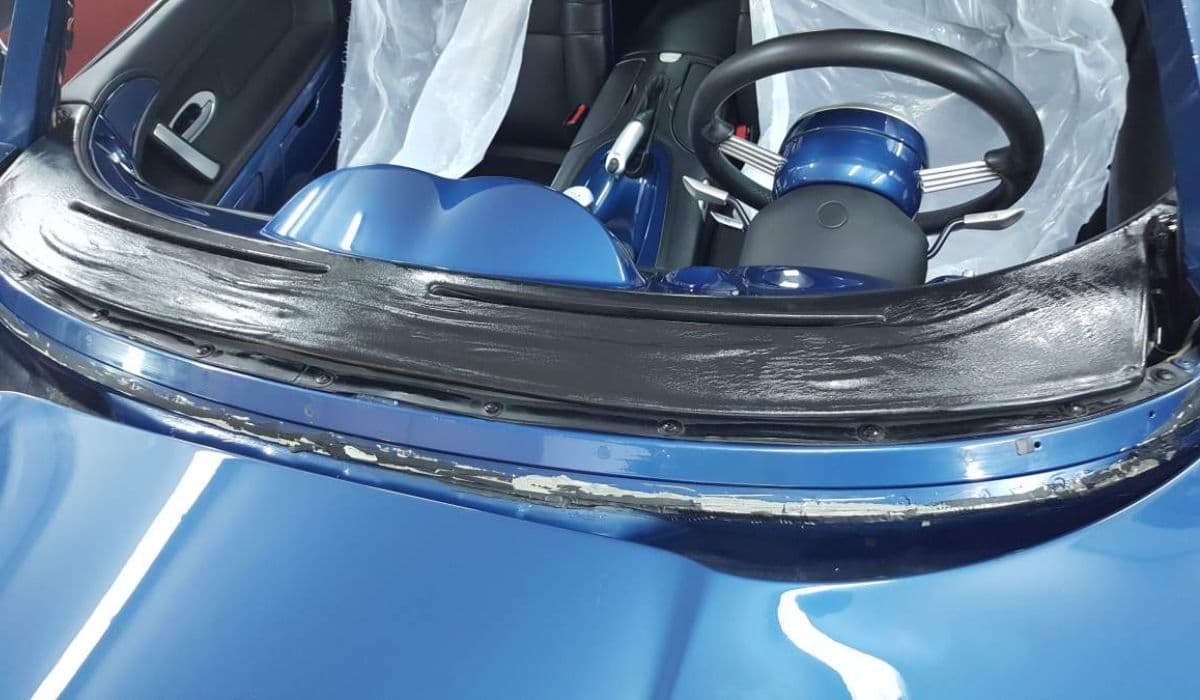
For widespread lifting, especially near the windshield, a more involved method yields professional results.
Carefully lift the separated covering using pry tools
Clean both the underside of the material and the dash substrate
Apply adhesive evenly to both surfaces with a brush or spreader
Warm the material slightly with a heat gun to increase flexibility
Stretch it back into position, aligning edges precisely
Press firmly and secure with weights or tape while it sets
In extreme cases, removing the windshield provides full access for stretching shrunk leather, though this is best left to experienced hands.
Tips for success:
Work in sections to maintain control
Use a rolling pin or similar tool to eliminate air pockets
Avoid over-applying glue to prevent lumps
Preventing Future Delamination
Once repaired, protect your work with smart habits.
Always use a windshield sunshade when parked outdoors
Apply UV protectant sprays formulated for interiors
Park in shade or garages whenever possible
Condition leather regularly to maintain suppleness
These steps can extend the life of both original and repaired dashes significantly.
With patience and the right techniques, dash delamination doesn't have to mean an expensive overhaul. Many BMW enthusiasts have restored their interiors to near-factory condition using these methods, enjoying a crisp, bubble-free dashboard for years to come.
More from BMW
How to fix high-voltage battery shutdown (BMW i4/iX recall)
14.12.2025 14:38
How to replace starter-generator connection BMW
14.12.2025 11:51
How to fix panoramic roof noise or leaks BMW
14.12.2025 07:56
How to fix brake booster vacuum issues BMW
14.12.2025 06:06
How to replace 12V battery and register it (2025 BMW X5/iX issues)
14.12.2025 03:36