How to replace high-pressure fuel pump BMW(HPFP)
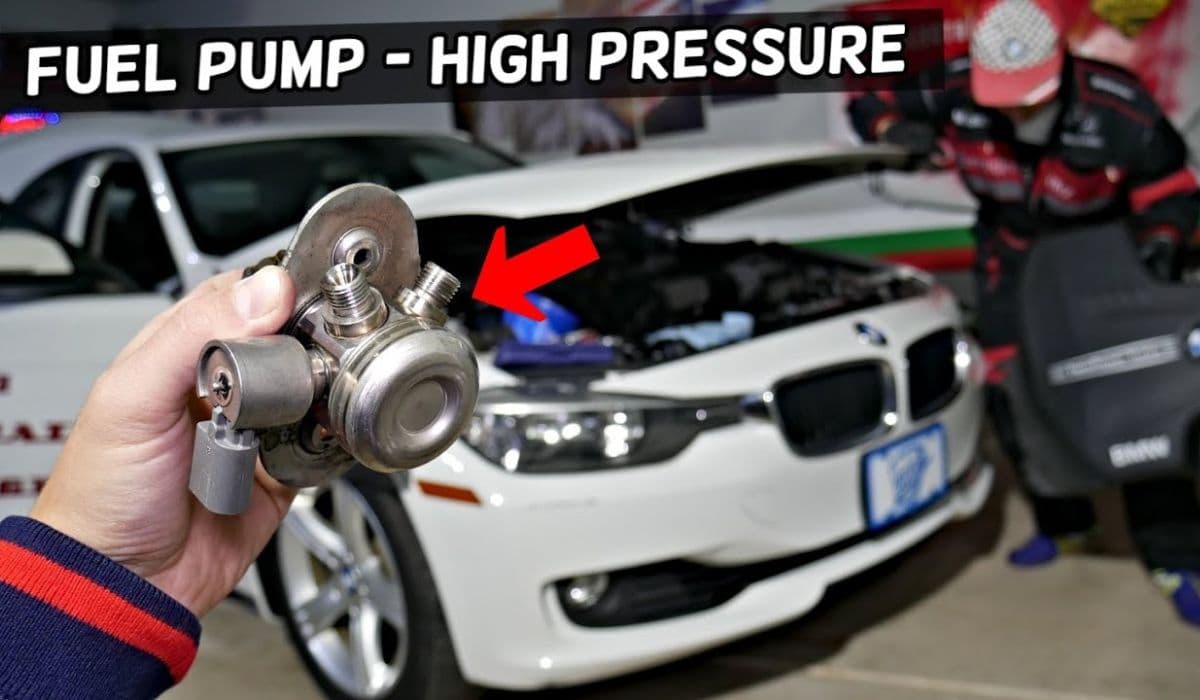
The high-pressure fuel pump (HPFP) is a critical component in BMW's direct-injection engines, responsible for delivering fuel at extreme pressures to the injectors for precise combustion. Found in turbocharged models like those with N54 and N55 engines, the HPFP operates under immense stress, driven directly by the camshaft. When it begins to fail, it can lead to frustrating drivability issues, but replacing it yourself can restore performance and prevent further engine problems. This guide walks through the process in detail, emphasizing precision to avoid common pitfalls.
Understanding the Role of the HPFP in BMW Engines
In BMW's modern gasoline direct-injection systems, the HPFP works alongside a low-pressure in-tank pump. The low-pressure pump supplies fuel to the HPFP, which then boosts it to pressures exceeding 2000 PSI for atomized delivery straight into the combustion chambers. This setup enables efficient power delivery and better fuel economy compared to traditional port injection.
The pump features a piston driven by a cam lobe, with internal valves controlling volume. Over time, wear on seals, the piston, or the cam follower can reduce output pressure, triggering limp mode or misfires. Interestingly, the HPFP's location under the intake manifold in many models makes access challenging, but with the right approach, the job becomes manageable for experienced DIY enthusiasts.
Common Symptoms of a Failing HPFP
Recognizing early warning signs can prevent stranded situations or injector damage from lean running conditions. Drivers often report progressive issues that worsen under load.
Prolonged engine cranking, especially on cold starts, as the system struggles to build rail pressure.
Rough idle or hesitation during acceleration, feeling like fuel starvation.
Loss of power in higher RPMs or when demanding boost from the turbo.
Check engine light with codes related to low fuel pressure, such as those indicating plausibility errors or insufficient delivery.
Occasional misfires or sputtering, particularly uphill or during overtaking.
These symptoms stem from the pump's inability to maintain consistent high pressure, forcing the engine control unit to limit performance for protection.
Tools and Parts Required for Replacement
Preparation is key to a smooth replacement. Gather these essentials beforehand to minimize downtime.
Basic hand tools: sockets (including T30 Torx), extensions, ratchet, and wrenches (17mm for fuel lines).
Torque wrench for precise bolt tightening.
Fuel line disconnect tools to safely release quick-connect fittings without damage.
Pick set and magnet for removing old gaskets or cam followers.
Shop rags, fuel-resistant gloves, and a drain pan to handle residual fuel spills.
New Genuine BMW HPFP, along with fresh seals, gaskets, and possibly an updated cam follower.
Diagnostic scanner to clear codes and monitor pressure post-installation.
Always work in a well-ventilated area and disconnect the battery to eliminate spark risks.
Safety Precautions Before Starting
Fuel systems hold residual pressure even when the engine is off, so safety comes first.
Relieve system pressure by running the engine with the fuel pump fuse removed or using the service port if equipped.
Disconnect the negative battery terminal to prevent electrical shorts.
Wear eye protection and gloves—gasoline is flammable and irritating.
Have a fire extinguisher nearby and avoid open flames.
Work on a cool engine to reduce burn risks from hot components.
Depressurizing properly minimizes fuel spray when disconnecting lines.
Step-by-Step Removal Process
Begin by removing engine covers and components blocking access. The exact layout varies by model, but the core steps remain similar.
Remove plastic engine beauty covers and any air intake ducting for better visibility.
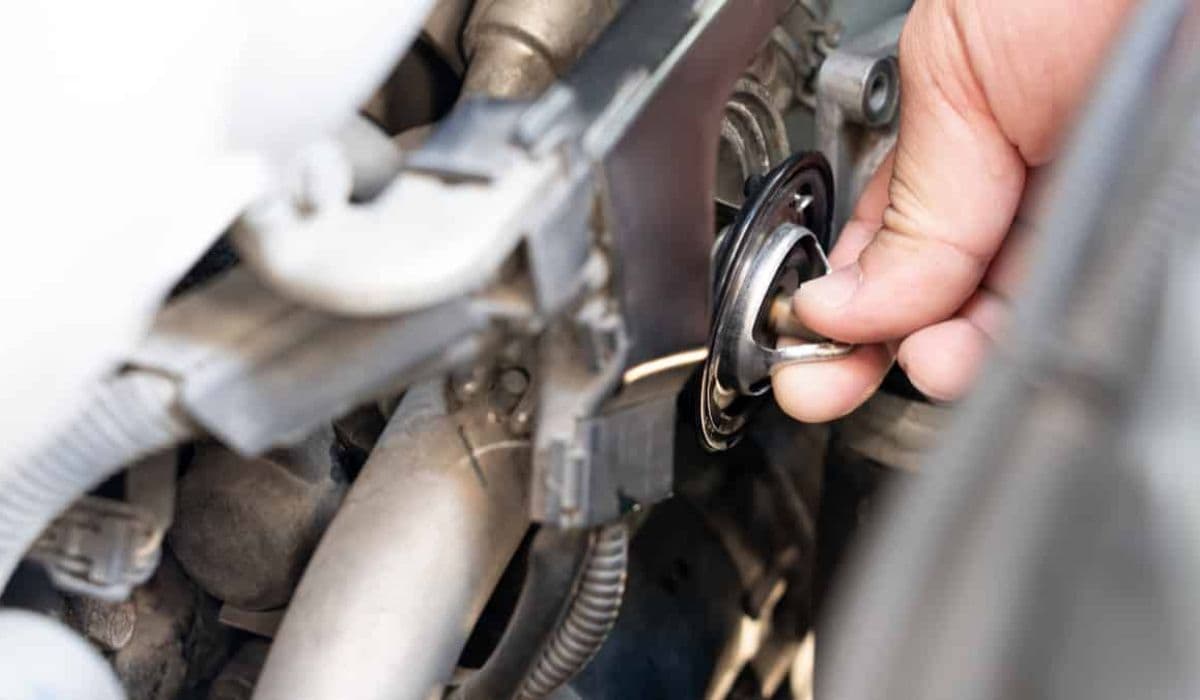
Locate the HPFP on the cylinder head, typically driver-side.
Disconnect the electrical harness plug from the pump.
Carefully release the high-pressure line to the rail and low-pressure inlet line—expect some fuel drip.
Loosen the mounting bolts (often T30 or hex) evenly, alternating to prevent binding as spring pressure from the cam follower pushes outward.
Gently pry or wiggle the pump free, noting the cam follower's position.
Inspect and remove the old cam follower with a magnet if it detaches; check for wear on the cam lobe.
Clean the mounting surface thoroughly to ensure a perfect seal on reinstallation.
Inspection and Preparation of Components
With the old pump out, take time to examine related parts.
Check the cam follower for scoring or flattening—replace if worn to avoid rapid failure of the new pump.
Inspect fuel lines for cracks or contamination.
Verify the high-pressure outlet seal is intact on the new unit.
Compare the new pump's volume control valve connector; some revisions require harness modification for compatibility.
Debris from a failing pump can migrate downstream, so consider flushing the system if symptoms were severe.
Installation of the New HPFP
Installation reverses removal, but attention to alignment is crucial.
Apply a thin film of clean engine oil to the new cam follower and seals for lubrication.
Position the pump carefully, ensuring the drive piston aligns with the cam lobe.
Hand-thread mounting bolts before torquing in a cross pattern to specification (typically around 13-15 Nm, but verify for your engine).
Reconnect fuel lines securely—listen for the click on quick-connects.
Plug in the electrical connector.
Reinstall any removed brackets or sensors.
Prime the system by cycling the key to run the in-tank pump without starting, building low pressure first.
Post-Replacement Steps and Testing
After reassembly:
Reconnect the battery and clear any stored fault codes with a scanner.
Start the engine and monitor for leaks at connections.
Use diagnostic tools to observe high-pressure rail values—they should build quickly to operating levels.
Test drive gently, checking for smooth acceleration and no return of symptoms.
Recheck torque on bolts after a heat cycle, as thermal expansion can loosen them slightly.
A successful swap often transforms a sluggish car back to responsive glory.
Tips for Longevity and Maintenance
To extend the life of your new HPFP:
Use top-tier gasoline from reputable stations to minimize contaminants.
Maintain regular fuel filter changes if applicable.
Monitor for early hesitation and address promptly.
Consider upgraded pumps for modified engines demanding higher flow.
Proactive care keeps these sophisticated systems reliable.
More from BMW

How to fix ADAS camera BMW calibration after windshield
20.12.2025 11:02
BMW: How to replace door handle carrier (interior melt)
20.12.2025 09:55
BMW: How to replace front lower control arms
20.12.2025 09:48
How to fix infotainment curved display glitches BMW
20.12.2025 09:44
BMW: How to replace starter motor (fire risk recall)
20.12.2025 09:41