How to replace thermostat and coolant flange
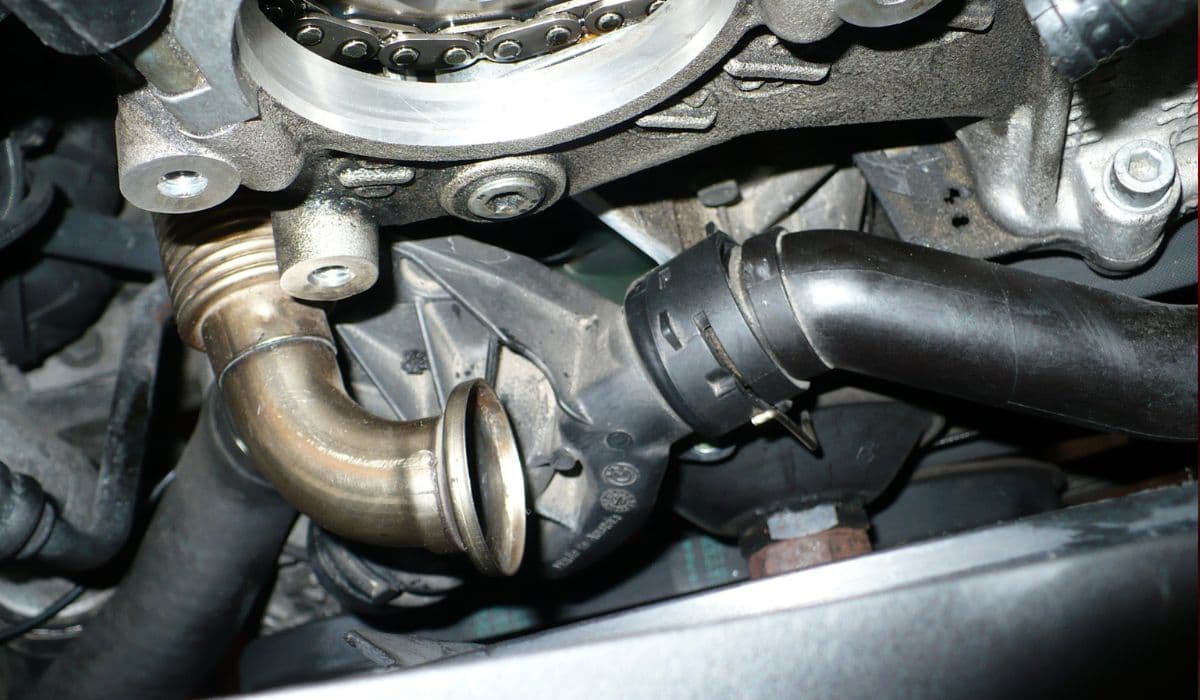
BMW's N20, N26, N51, N52, N53, N54, and N55 engines equip models such as the 328i, 335i, 528i, X3, X5, and Z4 across 2006-2018 production years. The distinctive "Mickey Mouse" coolant flange—named for its ear-shaped profile—connects the thermostat housing hose to the cylinder head, routing return coolant flow.
Original plastic construction withstands intense thermal stress poorly, leading to cracks or outright fragmentation after 80,000-120,000 miles. Turbocharged N54 and N55 variants suffer faster due to elevated exhaust-side temperatures, while N20 four-cylinders complicate access in compact bays. Thermostat failures often coincide, sticking closed to cause overheating or open to delay warm-up and reduce efficiency. Sudden flange rupture expels coolant violently, risking immediate overheating and strandings if ignored.
Spotting Indicators of Deteriorating Components
Rapid coolant depletion without under-vehicle puddles frequently evaporates on exhaust manifolds, depositing crusty residue near the flange. Overheating spikes, dashboard warnings, or steam signals acute breaches.
Persistent burning antifreeze odors or erratic gauge readings highlight thermostat malfunctions. Visual checks uncover fractures on flange ears or hose swelling from pressure. N52 naturally aspirated setups leak slower along seams, whereas N54/N55 show spray patterns on nearby turbo lines. Cabin heater inefficiency during cold weather further implicates stuck-open thermostats.
Gathering Specialized Tools and Superior Replacement Parts
Targeted preparation accelerates progress. Essential implements feature E10 external Torx sockets, 10mm wrenches, hose clamp pliers or cutters for factory crimps, plastic scrapers, and torque wrenches for 8-20 Nm ranges. Drain pans capture fluid, while cooling system pressure testers validate seals afterward.
Select aluminum flange upgrades (Rein CHC0609 or equivalents) for permanent reliability—kits include proper O-rings (thicker for N54/N55, thinner for N51/N52) and worm clamps. Pair with OEM thermostats (Behr/Mahle units) featuring integrated housings where applicable. Stock up on BMW blue coolant mixed 50/50 with distilled water, new bolts, and gaskets. Quality aftermarket like Victor Reinz matches durability without plastic vulnerabilities.
Verifying Failure Sources Prior to Deep Disassembly
Methodical isolation prevents unnecessary work. Degrease the flange area thoroughly, then drive to provoke re-staining for confirmation.
Pressure test at 1.5-2 bar to expose hidden cracks. Differentiate from valve cover seepage (oil mix) or expansion tank issues. Scanner checks for map thermostat codes (2EF4/2EF5) or temperature sensor discrepancies guide thermostat inclusion.
Draining Coolant and Gaining Access to Restricted Areas
Operate solely on cold engines to avoid pressurized bursts. Collect recoverable coolant via radiator and block drains.
Remove engine covers, intake ducts, or fan shrouds for clearance—N20 demands partial manifold shifts, N55 offers frontal exposure. Disconnect battery to suppress electrical interference during sensor handling.
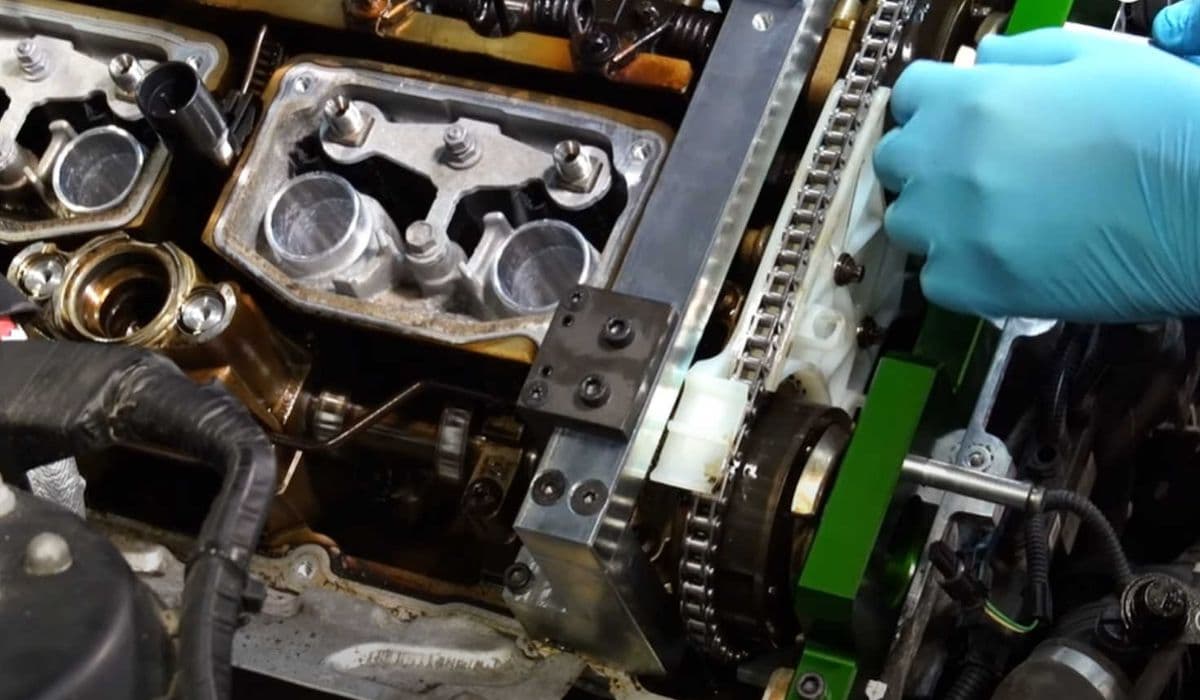
Extracting the Compromised Flange and Connected Hose
The Mickey Mouse flange mounts atop the cylinder head front with two bolts. Support the hose while loosening fasteners—old plastic often disintegrates upon disturbance.
Sever factory crimped clamps with cutters, then twist or slice the hose free without full removal. Withdraw the flange, clearing old O-ring fragments from the block recess. Aluminum upgrades slide onto existing hoses, secured by adjustable clamps for simplified service.
Integrating Thermostat Renewal in the Workflow
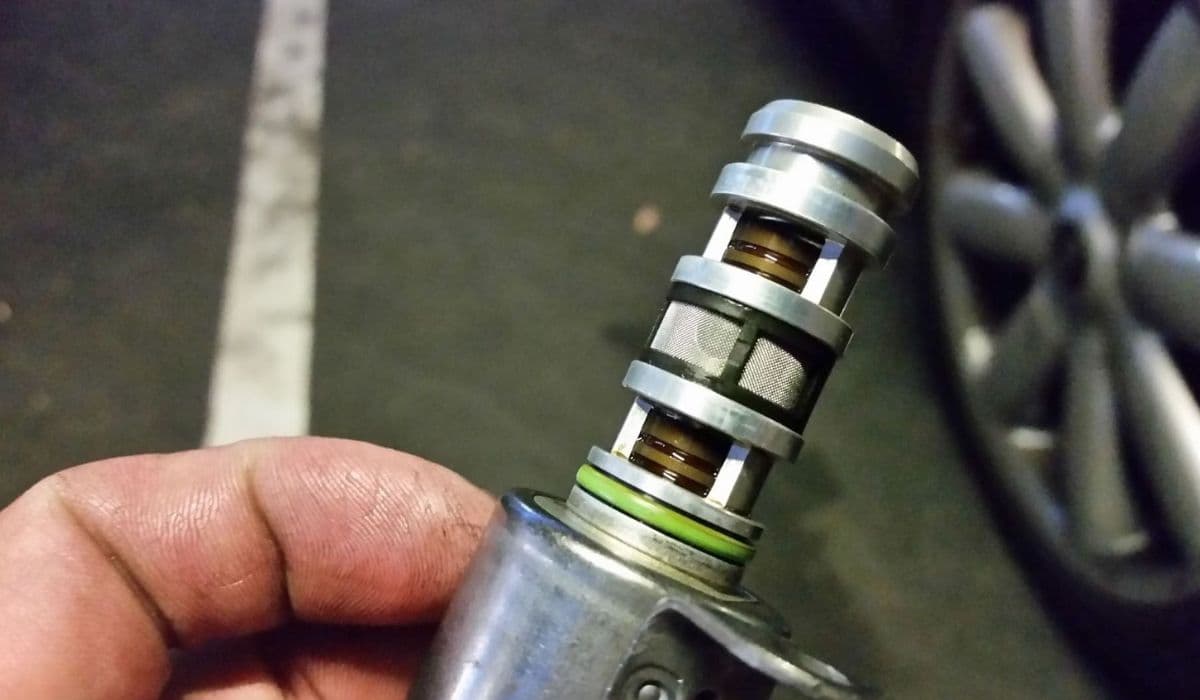
Thermostat positioning varies: N52/N54 locate lower near the water pump, necessitating belt detachment and housing bolts. Electronic N55 units require harness disconnection.
Drain residuals, unbolt housings (three to four fasteners), and swap units—orient jiggle pins upward for air purging. Clean sealing surfaces meticulously before new gaskets.
Fitting Upgraded Parts with Meticulous Alignment
Lubricate the correct O-ring and seat into the aluminum flange groove. Align dowels precisely, pressing until seated—chilling the part aids tight fits.
Torque bolts progressively crisscross to 10-12 Nm using fresh hardware. Reattach the hose fully over barbs, tightening clamps evenly. Reconnect sensors and routes without kinks.
Refilling Coolant and Executing Thorough Air Bleeding
Introduce mixture gradually to the expansion tank max line. Employ electric pump activation via scanner or manual cycling: Heater full hot, idle with cap removed, gentle revs to circulate.
Open bleed screws until bubble-free streams emerge. Repeat over multiple heat cycles, monitoring levels and temperatures stabilizing at 195-220°F.
Evading Frequent Pitfalls During Installation
Incomplete debris removal sustains leaks. Reverting to plastic invites repeats.
Cross-threading aluminum threads demands careful starts. Inadequate bleeding creates vapor locks and false overheating. Over-clamping distorts hoses; neglected bolt replacement risks loosening.
Reinforcing Cooling System Resilience for Extended Service
Proactive habits maximize gains. Flush entirely every 60,000 miles or four years with spec fluid.
Scan for pending codes periodically. Upgrade all plastic fittings preventively. Track levels monthly, addressing anomalies swiftly. Turbo models benefit from enhanced airflow shields reducing heat soak. Diligent oversight averts minor issues from compromising these refined thermal management systems.
More from BMW
How to fix VANOS solenoid rattle and codes
13.12.2025 11:32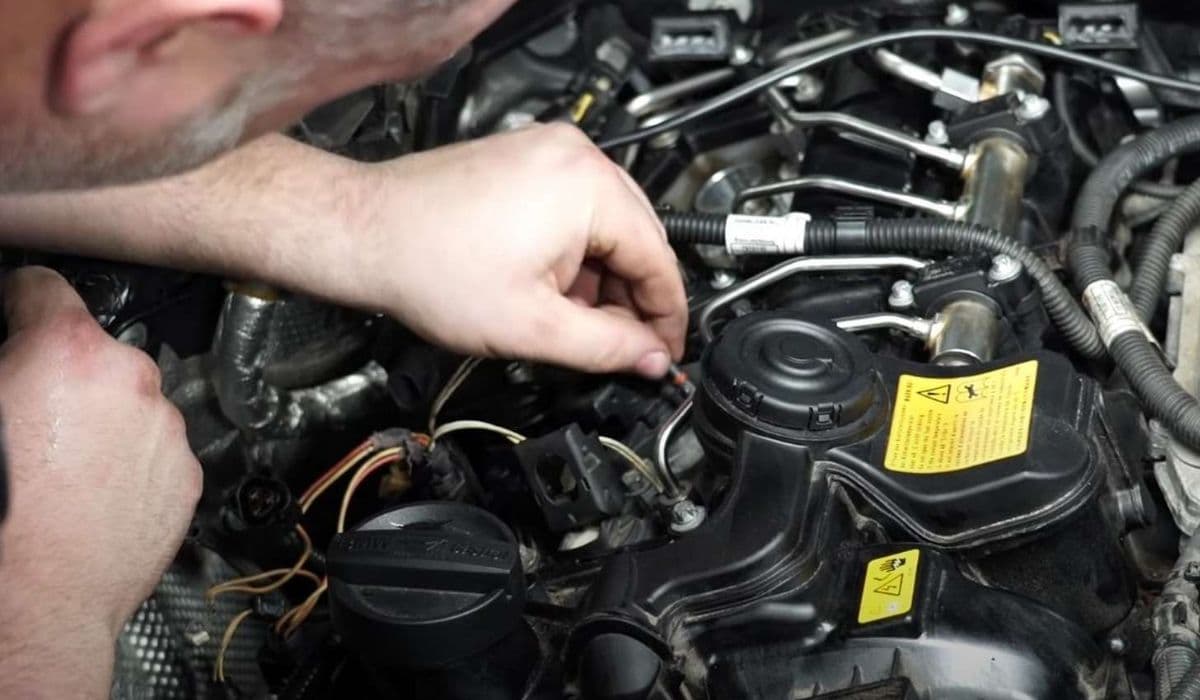
How to replace valve cover gasket oil leak (common on N20/N55)
13.12.2025 11:40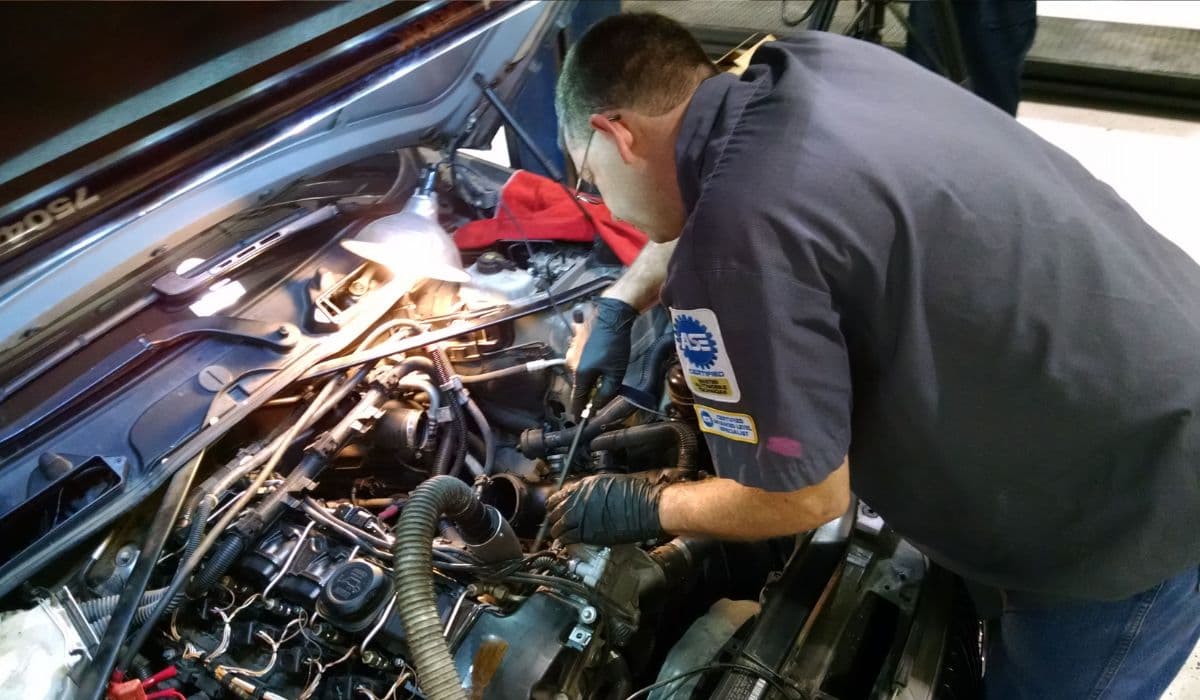
How to walnut blast intake valves for carbon buildup
13.12.2025 12:07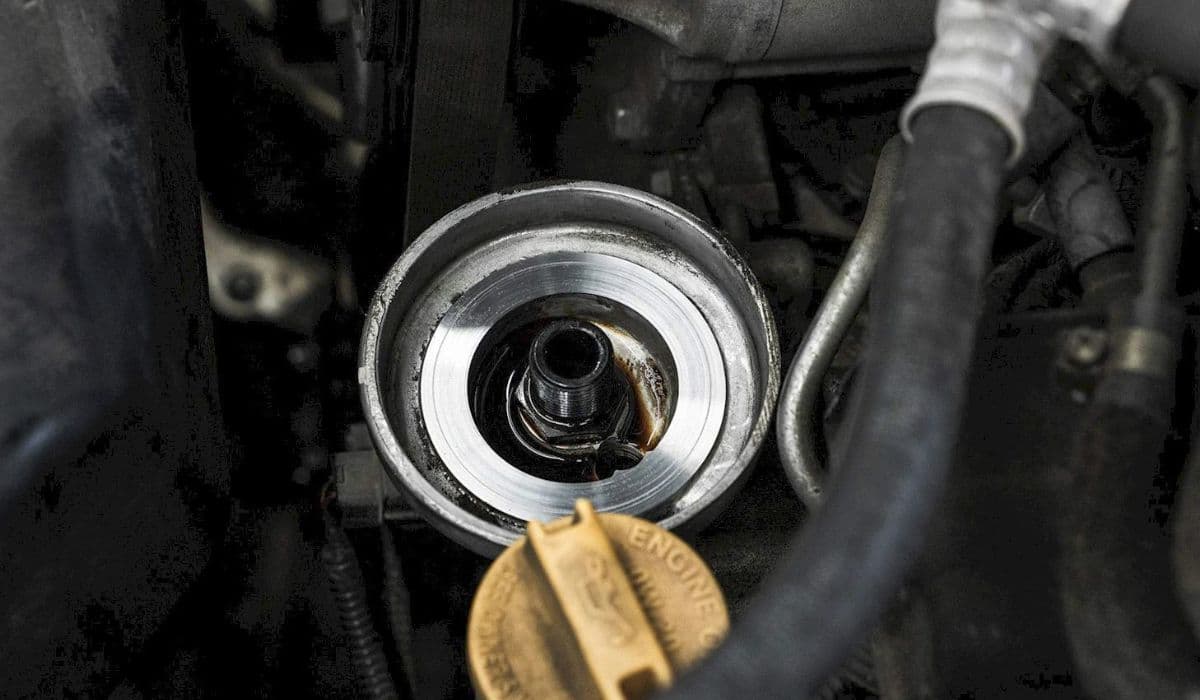
How to fix oil filter housing gasket (OFHG) leak
13.12.2025 12:13
How to fix drivetrain malfunction error (2025 models)
13.12.2025 12:24