How to fix trunk rattling over bumps (Tesla Model Y)
Tesla Model Y owners often encounter annoying rattling noises from the rear trunk area when driving over bumps or uneven roads. This issue disrupts the otherwise serene electric driving experience, turning smooth rides into symphony of creaks and thumps. Fortunately, most causes stem from minor assembly tolerances or vibrations in the liftgate and surrounding components. With systematic troubleshooting, many owners resolve these rattles through simple DIY adjustments, restoring cabin quietness.
Understanding Common Causes of Trunk Rattles
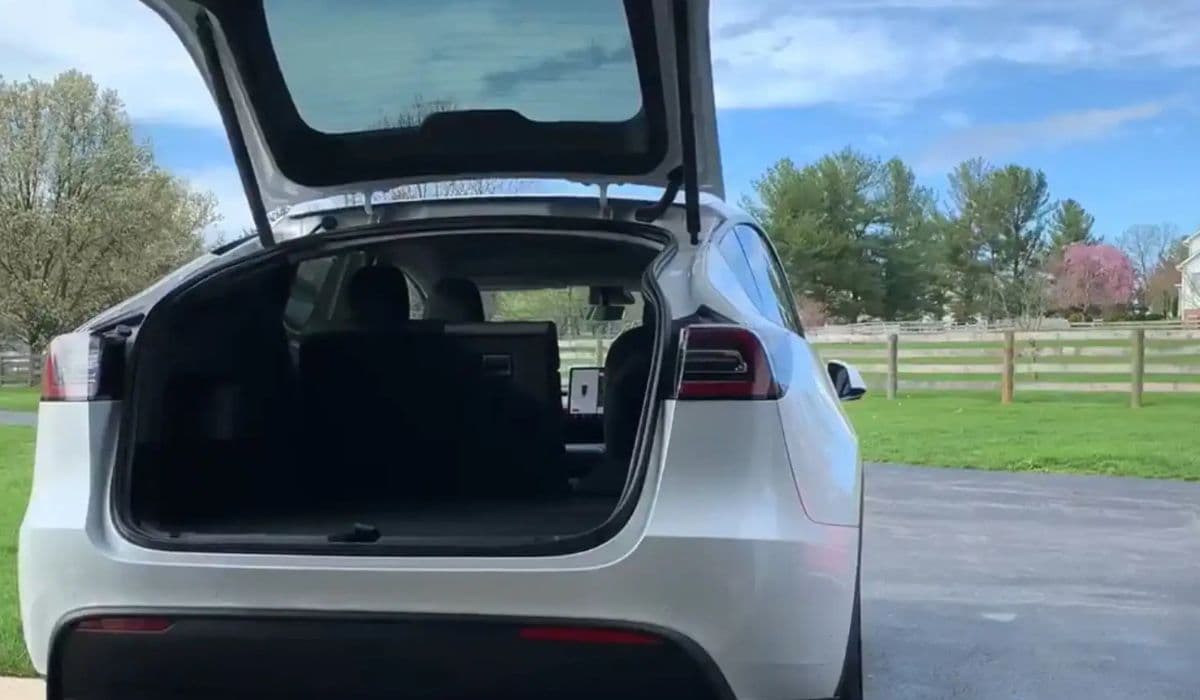
Rattling in the Model Y trunk typically originates from movement in the liftgate assembly, as the heavy power-operated hatch can shift slightly over imperfections in the road. Vibrations transfer to plastic panels, seals, or internal parts, amplifying sounds inside the cabin.
Key culprits include:
Misadjusted rubber bump stops that fail to hold the liftgate snugly when closed.
Loose or dry weather seals rubbing against the body.
Interior trim panels or clips vibrating against metal surfaces.
The parcel shelf (rear cargo cover) flexing or having internal loose elements.
Occasional loose cables, latches, or even seat-related components echoing from the rear.
These issues arise due to manufacturing variations and road-induced flex, but they rarely indicate major problems.
Quick Diagnostic Steps
Before making adjustments, pinpoint the source for efficient fixes.
Drive over a bumpy section with the radio off and listen carefully. Have a passenger sit in the rear to confirm the noise location.
Empty the trunk completely, including removing the parcel shelf if equipped.
Fold down the rear seats and remove any loose items.
Test drive again—if the rattle persists, it's likely structural rather than cargo-related.
With the vehicle parked, manually push or tap suspected areas like the liftgate edges, seals, or interior panels to replicate the sound.
This process often reveals the exact spot, saving time on trial-and-error fixes.
Adjusting the Rubber Bump Stops
The most frequent and effective solution involves the four adjustable rubber bump stops (also called snubbers or feet) on the liftgate.
These screw-in components ensure the closed hatch presses firmly against the body, preventing play.
Open the liftgate and locate the bump stops: two on the lower edges and two higher up near the roofline.
Use your fingers or a tool to twist them outward (counterclockwise to extend) incrementally.
Test closure: The liftgate should latch smoothly without excessive strain on the motor.
A helpful trick: Place a sheet of paper between each bump stop and the body contact point, close the hatch, and try pulling the paper out. It should resist strongly but not tear—if it slides easily, extend the stop further.
Balance all four for even pressure to avoid misalignment.
Many owners report near-total elimination of rattles after this adjustment, as it eliminates the "floating" sensation over bumps.
Addressing Seals and Panel Vibrations
If bump stops don't fully resolve the issue, focus on seals and panels.
Clean the liftgate weather seals thoroughly with a damp cloth, removing dust or debris that causes creaking during flex.
Inspect side seals along the hatch edges for compression or stiffness.
For panel slaps: Open the trunk and gently press on interior plastic trim, especially side panels or the upper rear headliner near the glass.
If pressing stops the noise, add soft padding like felt tape or thin foam strips where panels contact metal.
Avoid over-tightening, as it could strain the power liftgate mechanism.
These steps dampen vibrations effectively without permanent modifications.
Checking the Parcel Shelf and Other Components
The retractable parcel shelf can contribute significantly if present.
Remove it temporarily for a test drive—if the rattle vanishes, the shelf is likely vibrating internally or against supports.
Tap the shelf while installed to check for hollow thumps from loose stiffeners inside.
Secure buckles by inserting them into their stalks or wrapping with soft material to prevent metal-on-plastic contact.
Inspect rear headrests (raise or lower them) and ensure seatbacks are fully latched.
Loose cables under trunk carpeting or near the battery area occasionally cause metallic rattles—secure any visible wiring with tape if accessible.
When to Seek Professional Help
While most trunk rattles respond well to DIY methods, persistent or complex noises warrant attention.
Schedule a service appointment via the Tesla app, providing a video of the rattle for reproduction. Technicians often tighten latches, add factory foam insulation, or replace seals under warranty.
Combining owner adjustments with professional tweaks frequently achieves a whisper-quiet rear end.
By methodically addressing these areas, Model Y drivers reclaim the peaceful cabin Tesla EVs are known for, making every journey over bumps as smooth audibly as it is electrically.
More from Tesla

How to fix FSD visualization lag after Tesla 2025.14 update
16.12.2025 07:02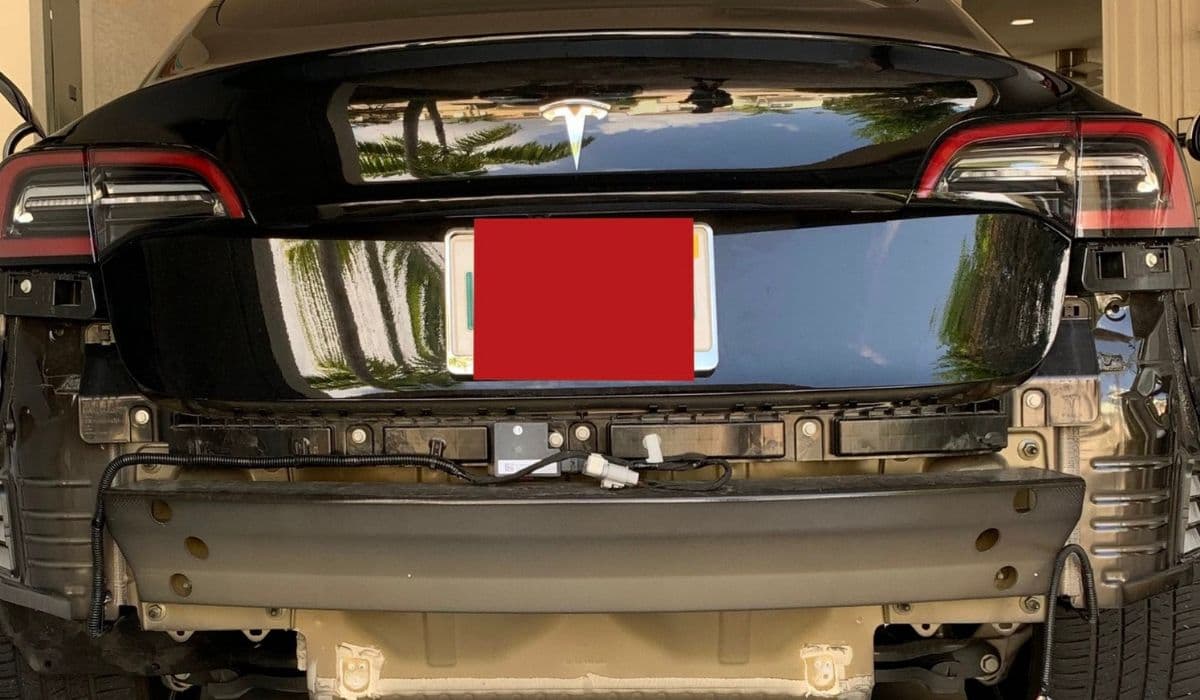
How to replace Tesla Model 3/Y rear bumper clips (easy DIY)
16.12.2025 05:46
How to fix phantom drain overnight Tesla
16.12.2025 04:50
How to replace octopus coolant leak (Tesla Model 3 2017–2020)
16.12.2025 03:21
How to replace torn rear seat bolsters Tesla
16.12.2025 03:09