How to replace half-shafts Tesla
Tesla vehicles rely on half-shafts, also known as drive axles or CV axles, to transfer power from the electric drive units to the wheels. These components endure immense torque from instant acceleration, which can lead to wear over time. Replacing them restores smooth operation and eliminates unwanted noises or vibrations.
Understanding Tesla Half-Shafts
Half-shafts in Tesla models connect the drive unit (motor and gearbox assembly) to the wheel hubs. They feature constant velocity (CV) joints at both ends to allow flexible power delivery during turns and suspension movement. Unlike traditional vehicles, Tesla's electric architecture delivers torque instantly, putting unique stress on these parts.
Common issues arise from spline wear at the hub or drive unit interfaces. Drivers often notice symptoms early, allowing proactive replacement before major problems develop.
Signs That Half-Shafts Need Replacement
Recognizing problems early prevents further damage. Pay attention to these indicators:
Clicking or popping sounds during low-speed turns or when shifting between drive and reverse.
Vibration or shudder felt through the accelerator pedal during hard acceleration.
Clunking noises when accelerating or decelerating, especially from a stop.
Uneven power delivery or mild wheel hop under torque.
These signs often stem from worn CV joints, loose axle nuts, or spline play. In dual-motor models, issues may affect front or rear axles independently.
Tools and Materials Required
Successful replacement demands specific tools for safe and effective work. Gather these essentials:
Floor jack and jack stands (or lift for better access).
Torque wrench capable of high values.
Socket set, including a large 32mm or similar for axle nuts.
Hub puller tool (hydraulic or manual) to separate the outer joint from the hub.
Axle removal tool, slide hammer, or cable extractor for the inner joint.
Dead-blow hammer or mallet.
Molykote M-77 or similar high-temperature lubricant paste.
New axle nuts and washers (always replace these).
Cut-resistant gloves and safety glasses.
Work in a well-ventilated area on a level surface.
Preparation Steps
Proper setup ensures safety and efficiency.
Park on a flat surface and engage parking brake.
For vehicles with air suspension, set to a standard ride height via the touchscreen.
Loosen wheel lug nuts and the central axle nut while the vehicle is on the ground (this prevents wheel rotation).
Jack up the vehicle and secure with stands.
Remove the wheel for full access to the hub area.
Disconnect any nearby components like brake hose brackets or wheel speed sensors carefully to avoid damage.
Removing the Old Half-Shaft
Removal requires patience to avoid forcing components.
Discard the old axle nut and washer.
Use a hub puller attached to the wheel studs to press the outer CV joint from the hub spline. Apply steady pressure until it releases.
Swing the knuckle assembly outward for clearance.
At the inner end, install a specialized axle removal tool or cable around the inner joint.
Use a slide hammer or controlled force to pop the half-shaft free from the drive unit. Listen for the release and keep hands clear.
Carefully maneuver the shaft out without damaging boots or seals.
Inspect the removed part for wear on splines or joints to confirm the diagnosis.
Installing the New Half-Shaft
Installation reverses removal but demands precision for secure seating.
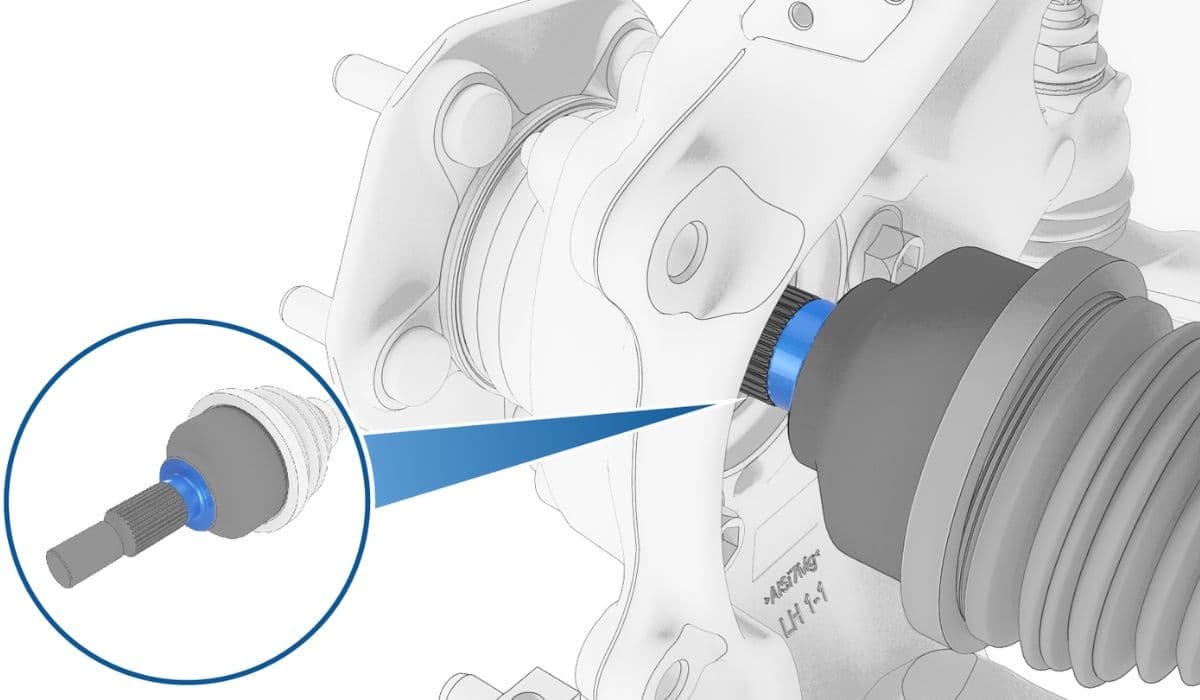
Apply a small amount (about 1 gram) of lubricant paste to the outer spline area where it meets the hub.
Align the inner splines and push the new half-shaft into the drive unit firmly until an audible click confirms the circlip engagement.
Position the outer end into the hub, then hand-thread the axle nut to draw it in fully (avoid power tools here to prevent thread damage).
Reinstall any disconnected sensors or brackets.
Install a new washer and axle nut, torquing to specification in stages.
Reattach the wheel and lower the vehicle.
Post-Installation Checks
After replacement, verify everything functions correctly.
Torque all fasteners properly, including wheel lugs in a star pattern.
Test drive at low speeds, checking for noises during turns and acceleration.
Monitor for vibrations under load.
Pump brakes several times to seat pads if the caliper was moved.
A short break-in period helps new components settle.
Tips for Longevity
Extend the life of new half-shafts with smart habits.
Avoid excessive launch control or aggressive acceleration repeatedly.
Maintain proper wheel alignment to reduce uneven stress.
Keep suspension at recommended heights to minimize joint angles.
Regularly inspect for loose nuts during tire rotations.
With care, replacements can deliver reliable performance for many miles.
More from Tesla

How to fix HVAC blend door actuator clicking noise Tesla
16.12.2025 13:16
How to fix FSD visualization lag after Tesla 2025.14 update
16.12.2025 07:02
How to fix phantom drain overnight Tesla
16.12.2025 04:50
How to replace octopus coolant leak (Tesla Model 3 2017–2020)
16.12.2025 03:21
How to replace torn rear seat bolsters Tesla
16.12.2025 03:09