How to replace rear toe links (Tesla Cybertruck recall DIY check)
The Tesla Cybertruck's innovative rear steering system sets it apart from traditional pickups, offering exceptional maneuverability with its four-wheel steering capability. At the heart of this setup are the rear toe links—critical suspension components that connect the rear steering actuator to the wheel knuckles. These links help control toe alignment during turns, ensuring precise handling and stability, especially when navigating tight spaces or off-road trails.
While Tesla has addressed various recalls on the Cybertruck, owners interested in suspension health often perform DIY inspections on components like the rear toe links. Issues such as unusual steering feel, noises from the rear, or alignment drifts can signal wear. Replacing these links requires mechanical skill, but with the right approach, experienced DIYers can tackle it safely. This guide walks through the process in detail, emphasizing caution and precision.
Understanding the Role of Rear Toe Links in the Cybertruck
Rear toe links play a vital role in the Cybertruck's advanced suspension design. Unlike conventional trucks with fixed rear axles, the Cybertruck features an active rear steering actuator that adjusts wheel angles for better turning radius and high-speed stability.
The toe link transfers motion from the actuator to the knuckle, allowing dynamic toe changes.
Proper function prevents excessive tire wear, maintains straight-line tracking, and enhances off-road articulation.
Over time, stress from heavy loads, rough terrain, or manufacturing variations can lead to play or damage in these links.
Performing a DIY check involves visual inspection for cracks, bends, or loose fittings. If replacement is needed, sourcing genuine parts ensures compatibility with the vehicle's electronic systems.
Safety Precautions Before Starting Any Work
Working on suspension components demands strict safety measures, as the Cybertruck's massive weight and high-voltage systems pose unique risks.
Park on a level, firm surface and engage the parking brake.
Disconnect the high-voltage system using the service mode in the vehicle's menu to prevent accidental activation.
Use wheel chocks on the opposite side and ensure the vehicle is stably supported.
Wear protective gear, including gloves and eye protection, to handle sharp edges on the stainless steel exoskeleton.
Never work under the vehicle supported only by a jack—always use sturdy jack stands rated for the Cybertruck's heft.
Tools and Materials You'll Need
Gathering the right tools upfront makes the job smoother and reduces downtime.
Floor jack and jack stands (heavy-duty, capable of supporting over 7,000 pounds).
Torque wrench (essential for precise fastening).
Socket set, including deep sockets for suspension bolts.
Pry bar or support tool for the knuckle.
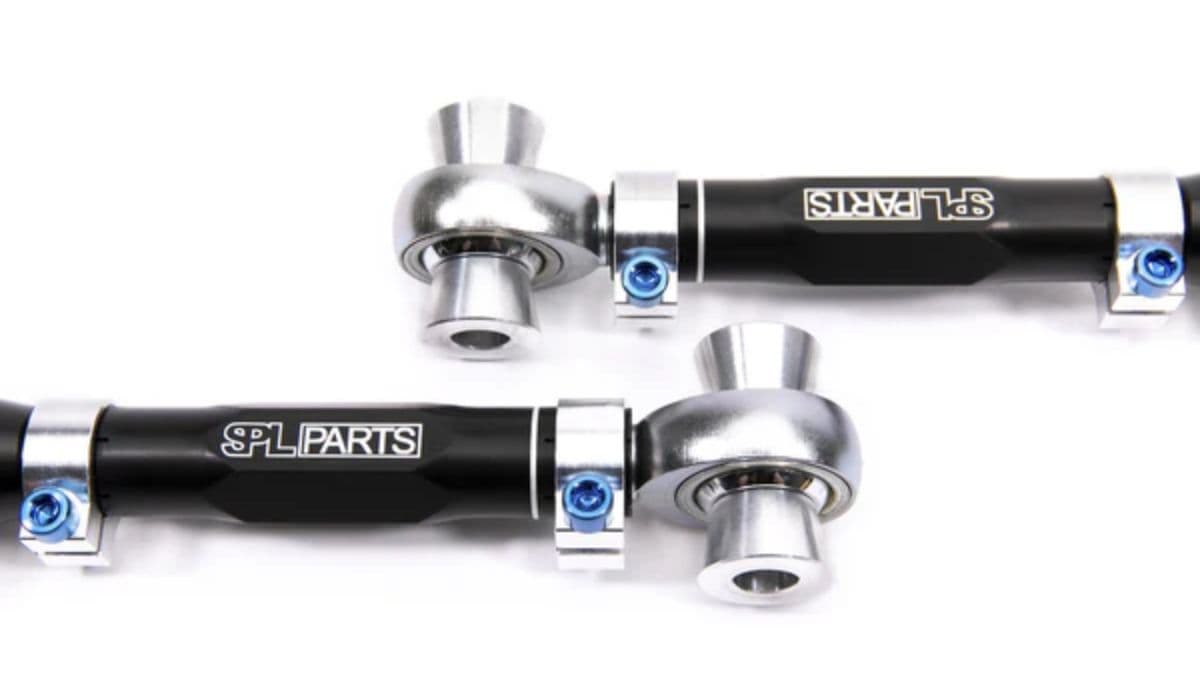
New replacement toe links (left and right, if doing both sides).
New hardware, such as nuts and bolts, as many are single-use.
Having a helper can make aligning components easier during reinstallation.
Step-by-Step Removal Process
Begin with the vehicle in service mode and the rear raised safely.
Remove the rear wheel on the side you're working on for clear access.
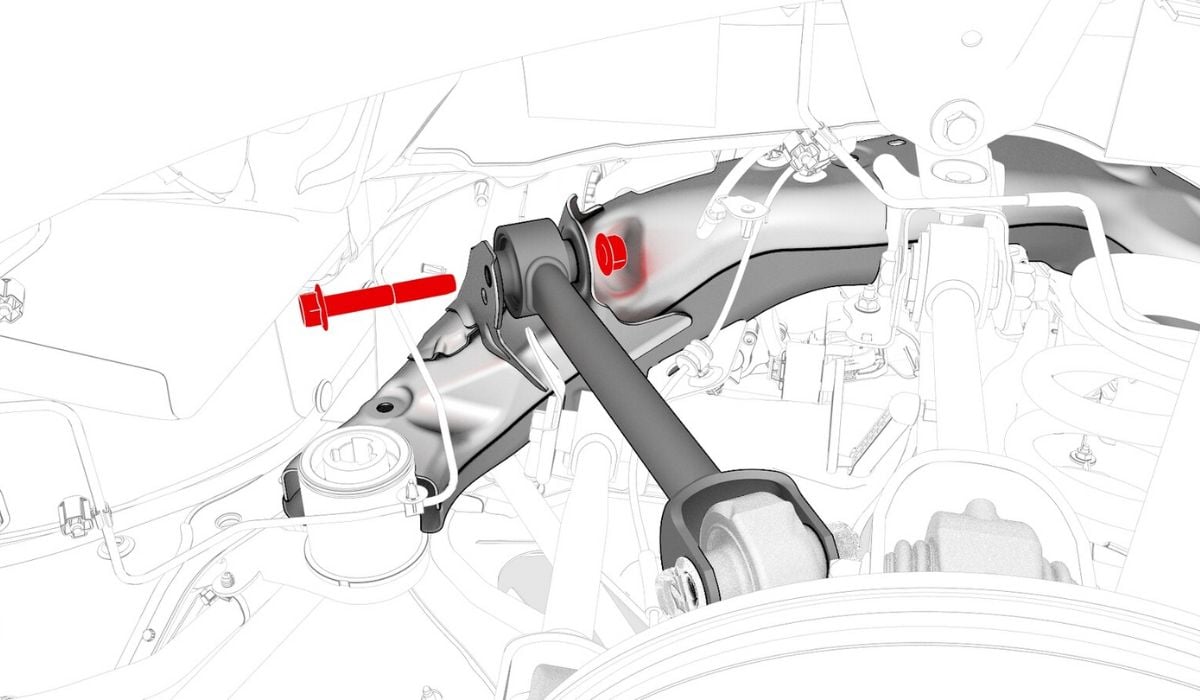
Locate the rear steering actuator and the toe link attachments.
Support the rear knuckle to prevent it from dropping suddenly.
Carefully remove the bolt connecting the toe link to the steering actuator.
Discard the old nut securing the toe link to the knuckle and detach it fully.
Inspect the removed link for any signs of wear, such as elongated holes or corrosion, which could explain handling quirks.
Installation of New Rear Toe Links
Reassembly requires attention to alignment to avoid introducing new issues.
Position the new toe link against the knuckle and install a fresh nut, hand-tightening initially.
Align the other end with the rear steering actuator and insert the bolt, again hand-tight only.
Ensure the link sits naturally without forcing it, preserving factory geometry.
Reinstall the wheel temporarily if needed for lowering the vehicle.
Torque all fasteners in stages, following a cross-pattern where applicable, to achieve even pressure.
Post-Replacement Checks and Alignment
After lowering the vehicle and reconnecting systems:
Perform a test drive at low speeds, listening for unusual noises and feeling for stable steering.
Monitor for warning lights on the dashboard related to steering or suspension.
A professional four-wheel alignment is highly recommended afterward, as toe adjustments are precise on the Cybertruck.
Regularly checking torque on suspension bolts in the weeks following can catch any settling.
Common Mistakes to Avoid During DIY Replacement
Even seasoned mechanics can overlook Cybertruck-specific nuances.
Skipping high-voltage disconnect, risking system activation.
Reusing old hardware, which may not hold torque properly.
Forgetting to support the knuckle, leading to strained components.
Neglecting a follow-up alignment, causing premature tire wear or instability.
Taking time to double-check each step pays off in long-term reliability.
Mastering rear toe link replacement empowers Cybertruck owners to maintain their vehicle's cutting-edge performance. With careful execution, this task restores crisp handling and peace of mind on any adventure.
More from Tesla

How to fix HVAC blend door actuator clicking noise Tesla
16.12.2025 13:16
How to fix FSD visualization lag after Tesla 2025.14 update
16.12.2025 07:02
How to fix phantom drain overnight Tesla
16.12.2025 04:50
How to replace octopus coolant leak (Tesla Model 3 2017–2020)
16.12.2025 03:21
How to replace torn rear seat bolsters Tesla
16.12.2025 03:09