How to replace upper control arm fore links (2024–2025 Tesla Model 3 Highland)
The Tesla Model 3 Highland features a refined front suspension system that enhances ride comfort and handling precision. The upper control arms, often referred to as fore links in Tesla's terminology, play a critical role in maintaining proper wheel alignment, absorbing road imperfections, and ensuring stable cornering. These components connect the wheel knuckle to the vehicle's body, allowing controlled movement while minimizing noise and vibration.
Over time, wear on the ball joints or bushings can lead to noticeable symptoms like clunking sounds over bumps, uneven tire wear, or a vague steering feel. Replacing the upper control arm fore links restores the suspension's integrity, improving overall driving dynamics and safety.
Understanding the Front Suspension in the Model 3 Highland
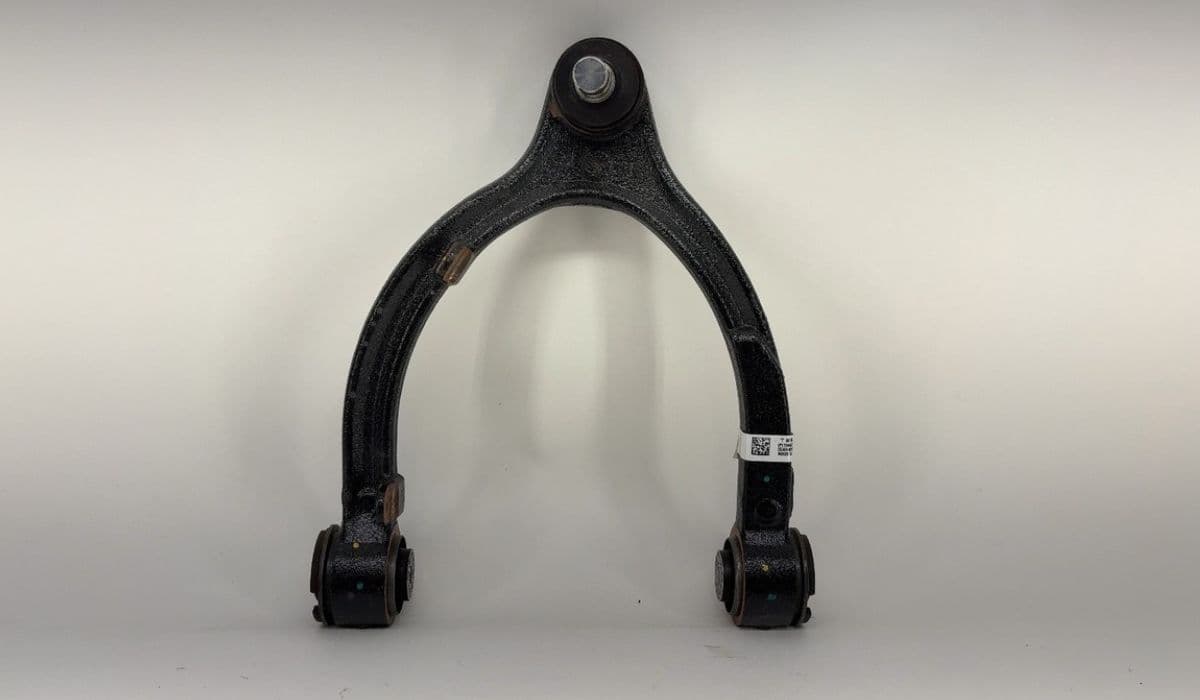
The Highland refresh introduced subtle but significant updates to the suspension geometry and components for better noise isolation and compliance. The front upper control arms are forged aluminum pieces with integrated ball joints, designed for durability and lightweight performance.
Unlike earlier models where ball joint creaking was common due to lack of grease fittings, the Highland variants benefit from improved materials and sealing. However, potholes, aggressive driving, or high mileage can still necessitate replacement.
Key benefits of timely replacement include:
Sharper steering response
Reduced cabin noise from suspension
Even tire wear for longer lifespan
Enhanced stability during high-speed maneuvers
Signs That Your Upper Control Arm Fore Links Need Replacement
Detecting issues early prevents further damage to related components like shocks or tires. Pay attention to these indicators:
Audible clunks or squeaks from the front wheels when going over uneven surfaces
Vibration felt through the steering wheel at certain speeds
Pulling to one side during braking or acceleration
Visible play in the wheel when jacked up and rocked top-to-bottom
Uneven or premature tire wear on the inner or outer edges
If multiple symptoms appear, inspect both sides, as wear often occurs asymmetrically but replacing in pairs is recommended for balanced handling.
Tools and Materials Required
Performing this repair requires basic to intermediate mechanical skills and proper tools to avoid damaging components. Gather these essentials:
Jack and jack stands (or lift for better access)
Wheel chocks
Torque wrench (capable of precise settings)
Socket set including deep sockets
Wrenches for holding bolts
Pry bar for gentle separation
Marker for alignment reference
New upper control arm fore links (OEM recommended for exact fit)
Replacement fasteners (nuts and bolts as specified)
Work in a well-lit, level area and disconnect the 12V battery for safety if accessing underhood areas extensively.
Preparation Steps
Safety comes first when working on suspension.
Park on a flat surface and engage the parking brake.
Chock the rear wheels.
Loosen the front wheel lug nuts slightly.
Raise the vehicle using the designated lift points (consult the owner's manual for exact locations).
Remove the front wheels for full access.
Support the knuckle assembly to prevent strain on brake lines or other links.
Mark the position of the upper mount bolts relative to the body before loosening. This helps maintain approximate camber alignment and reduces the need for full readjustment later.
Removal Process
The procedure focuses on the driver's side; repeat symmetrically for the passenger side.
Access the underhood area by lifting the cowl screen panel.
Locate the four bolts securing the upper control arm to the shock tower.
Remove the nut connecting the stabilizer bar link to the damper assembly and move it aside (use a pry bar if stuck).
Disconnect the ball joint from the knuckle: remove the nut and separate with a suitable tool if pressed in.
Carefully maneuver the arm out, noting the routing to avoid snagging wires or hoses.
Inspect the removed part for wear patterns—excessive play in the ball joint or cracked bushings confirm the need for replacement.
Installation of New Upper Control Arm Fore Links
Reverse the removal steps with attention to torque specifications for safety.
Position the new arm, aligning with marked references.
Hand-tighten the body mount bolts initially.
Reconnect the ball joint to the knuckle with a new nut.
Reattach the stabilizer bar link.
Install the wheel temporarily and lower the vehicle partially to load the suspension.
Torque all fasteners in sequence: body mounts first, then knuckle and link connections.
This loaded torquing ensures bushings settle naturally, preventing premature wear.
Post-Replacement Checks and Alignment
After reinstalling wheels and lowering fully:
Torque wheel lugs in a star pattern.
Test drive at low speeds, listening for abnormal noises.
Check for smooth steering and no pulling.
A professional four-wheel alignment is strongly advised afterward. Suspension work alters geometry, affecting tire life and handling. Many shops offer this service with precise laser equipment tailored for EVs.
Tips for Longevity and Maintenance
To maximize the life of your new components:
Avoid potholes and curbs when possible.
Rotate tires regularly to distribute wear.
Inspect suspension during routine servicing.
Consider upgraded aftermarket arms if tracking the vehicle frequently.
Proper maintenance keeps the Highland's acclaimed ride quality intact, delivering that signature silent and composed electric driving experience.
More from Tesla

How to fix FSD visualization lag after Tesla 2025.14 update
16.12.2025 07:02
How to replace Tesla Model 3/Y rear bumper clips (easy DIY)
16.12.2025 05:46
How to fix phantom drain overnight Tesla
16.12.2025 04:50
How to replace octopus coolant leak (Tesla Model 3 2017–2020)
16.12.2025 03:21
How to replace torn rear seat bolsters Tesla
16.12.2025 03:09